FreeNAS install and configuration
Published 30 January 2016.
Introduction
This guide will take you through installation and basic configuration of key services enabling secure access, regular disk checking, scrubs and email warnings which are all in my opinion vital to ensure reliable robust operation of your server. I’ll build upon this guide with configuration guides for setting up a suite of media applications.
Installation
Download the latest FreeNAS ISO image from FreeNAS.org, this guide is based on the current 9.3.1 build.
Create a bootable USB stick with the downloaded image. I like using Rufus on Windows but there are several means to accomplish this.
Insert and boot your intended FreeNAS box from the USB key
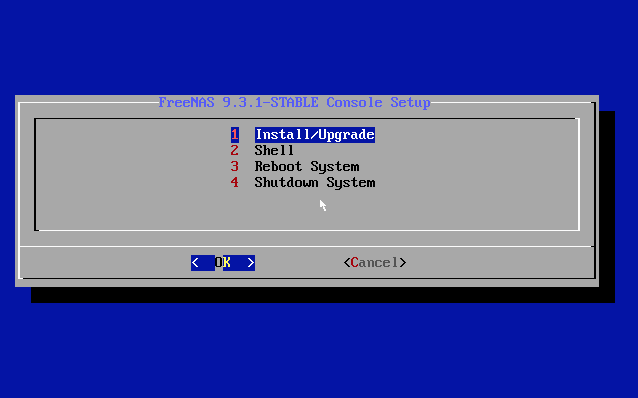
When prompted, select option 1 to install FreeNAS.
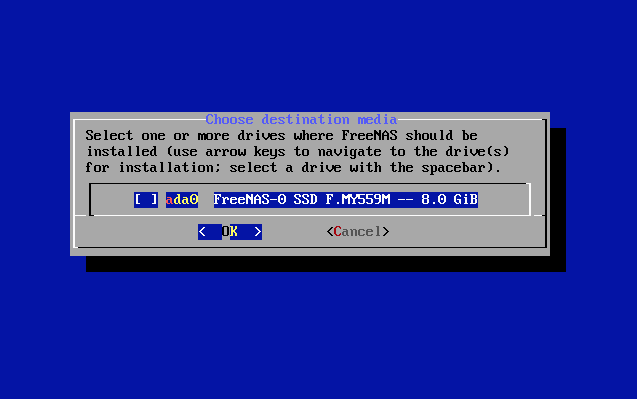
Select where you wish to install FreeNAS. My recommended options include dual-USB sticks (8GB minimum each) or Supermicro SATA-DOM modules. You can use SSD’s too if you want but it’s overkill in my opinion.
Enter desired root password and then FreeNAS will commence installation.
Shortly after you should be presented with a success screen.
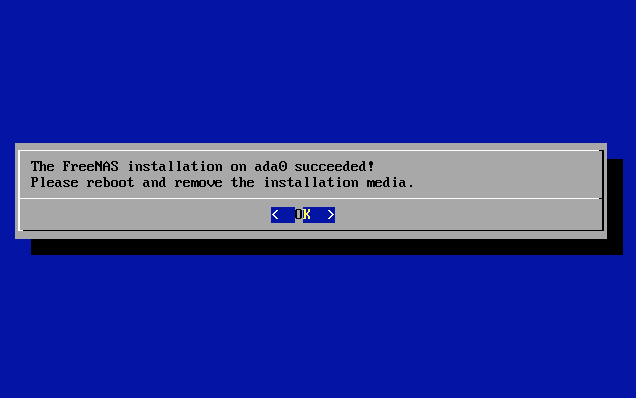
Remove the FreeNAS install USB and select Ok to reboot.
Configuration
Your machine should now proceed to boot form the new created FreeNAS image. Once booting has completed, you will be presented with a menu. Lets configure the network interfaces first to allow us to connect to the web interface where we will conduct the rest of the configuration from.

Enter 1 to Configure Network Interfaces, depending on the type of network interfaces you have, yours may be called something other then em0, select accordingly.
- Select NIC to configure: em0
- Reset Network Interface: n
- Configure Interface for DHCP?: n
- Configure IPv4?: y
- Interface name: em0
- IPv4 Address: 192.168.71.99/24 (Select your own unique address that makes sense for your network config)
- Configure IPv6?: n
The menu page should redisplay with the updated network configuration prompting you with the address to try to access the web user interface.
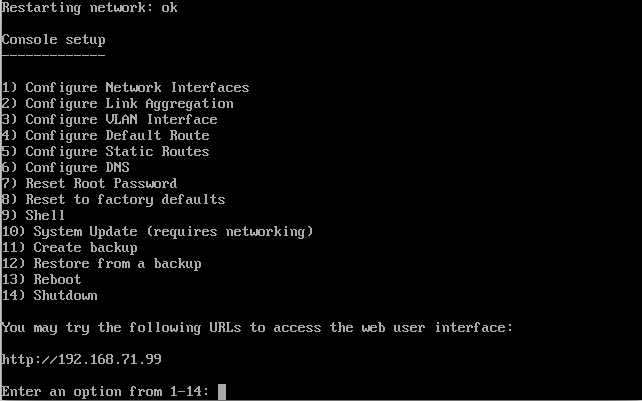
You should now be able to access the web interface at the address you entered, in my example here 192.168.71.99.
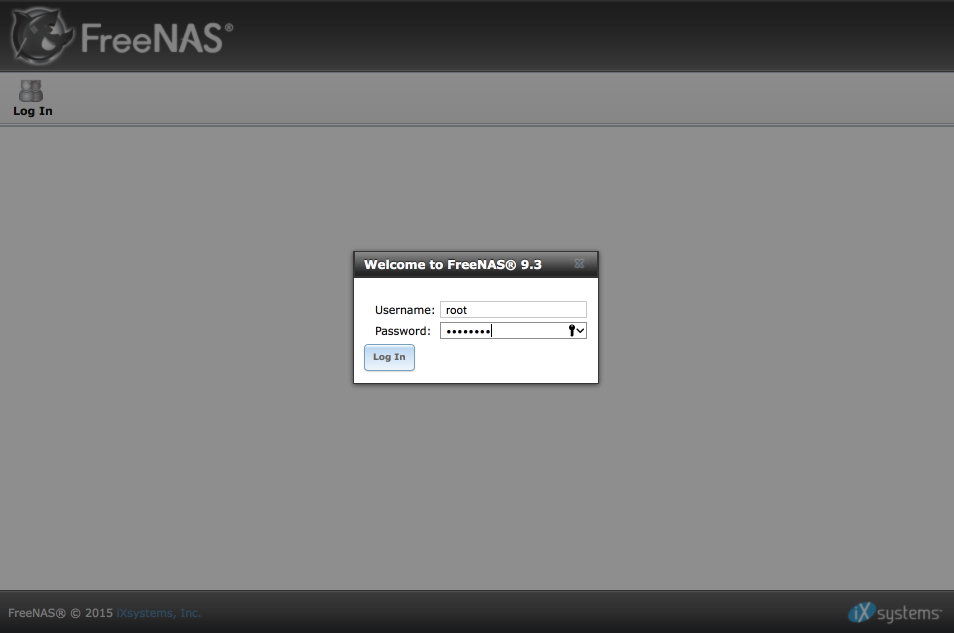
Proceed to login with username =’root’ and the password you set during installation.
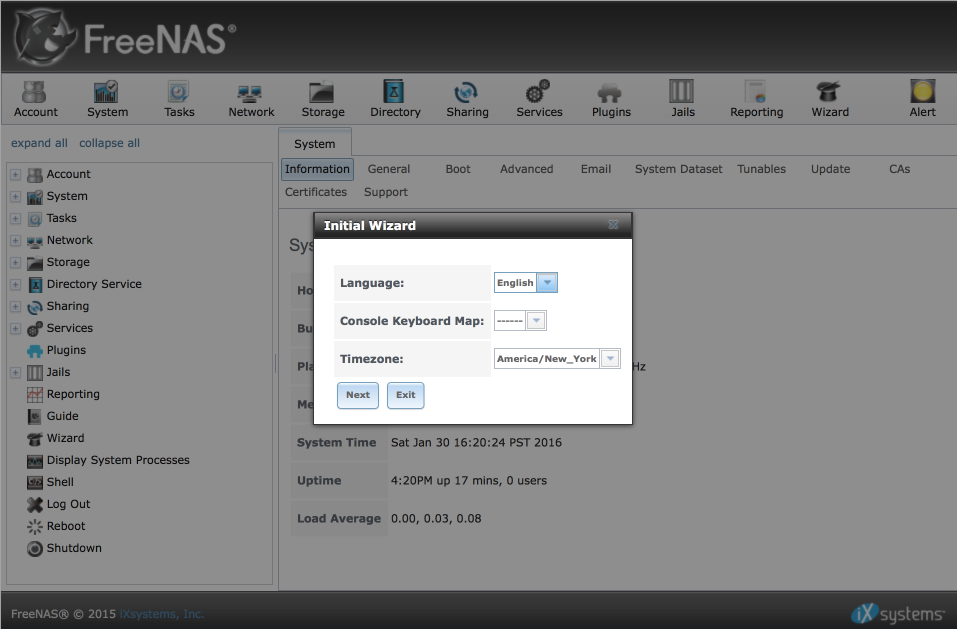
Complete the first stage of the initial wizard as follows:-
- Language = English
- Console Keyboard Map = —-
- Timezone = Your local timezone
- Select ‘Next’ to move on to creating a storage pool.
Create pool
Its not possible to advise outside of some general guidelines what and how best to structure an array of disks. Array configuration can be such as to prioritise IO, maximise capacity or redundancy. Its worth doing your research here, once you have created an array and populated it with data it can be difficult to migrate to another configuration.
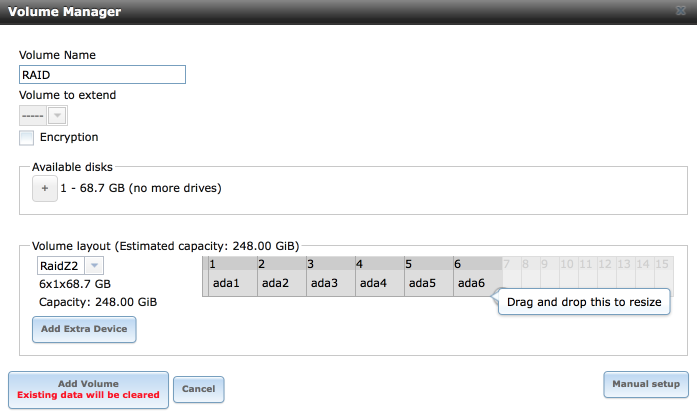
For the sake of this guide, I’m going to create a 6 disk RAIDZ2 array which provides redundancy of two disks being lost from the array. The resilvering process which runs when a disk fails stresses the remaining disks in the array and it isn’t unknown for an additional disk to fail during the process. The problem is compounded by the capacity of drives now reaching and exceeding 4TB. For this reason I advise a RAIDZ2 as a minimum configuration. Hotspares and/or RAIDZ3 are alternatives worth considering.
- Volume Name = RAID
- Volume to extend =
---- - Encryption = [ ]
- Volume Layout = Drag slider to right including all your available disks
- Select RAIDZ2 from the drop down on the left
- Select Add Volume which will create the volume. N.B. This process destroys all the data on the disks.
After a short while, you will be presented with a summary of the RAID volume you just created. The top ‘RAID’ label represents the pool, the second label is the RAID dataset. The reason for the size difference is the dataset only includes the useable space, not the overheads associated with the redundancy.

Setup FreeNAS foundations
The following are what I consider to be best practice steps worth undertaking for peace of mind.
Enable HTTPS access to the web configurator
Navigate to System > Certificates & click on Create Certificate Signing Request
- Name: FreeNAS_CA
- Key length: 2048
- Digest Algorithm: SHA256
- Lifetime: 3650
- Country: Your Country
- Locality: Your location
- Organization: Your organization name
- Email address: Your email address
- Common name: freenas.local.lan
The visor should report successful creation of the Internal Certificate Authority.
Now navigate to System > Certificates & Click on Create Internal Certificate
- Signing Certificate Authority: FreeNAS_CA (the CA we just created)
- Name: FreeNAS_cert
- Key length: 2048
- Digest Algorithm: SHA256
- Lifetime: 3650
- Country: Your Country
- Locality: Your location
- Organization: Your organization name
- Email address: Your email address
- Common name: freenas.local.lan
The visor should report successful creation of the Internal Certificate.
Now navigate to System > General and set the following options to enable HTTPS access.
- Protocol: HTTPS
- Certificate: FreeNAS_cert (the one we just created)
- Save
The GUI will now restart and you will be prompted to accept a certificate before being able to log back in via a secure connection.
Miscellaneous additions
Display the console log in the bottom part of the GUI window.
Navigate to System > Advanced
- Show console menu in footer: [√]
- Save
Optimize system dataset.
This retains the RRD system log data in the pool rather than on the more limited system drive. Benefits are that historic data wont be lost of you need to replace your system disk and also space on the system disk is usually more limited than in your pools.
Navigate to System > System Dataset
- Select your System dataset pool
- Syslog: [√]
- Reporting Database: [√]
- Click Save
Set NTP servers
Worth validating the default NTP servers are correct for your requirements. I sync all my local devices to my pfSense firewall instead of th freebsd ones.
Navigate to System > General > NTP Servers
- NTP Servers: verify they are set as required. By default they point to
freebsd.pool.ntp.org.
Set network configuration
Navigate to Network > Global Configuration
- Hostname: FreeNAS, most importantly make sure its a unique name
- Domain: local.lan (this is my local domain)
- My FreeNAS box is allocated a static DHCP address via its MAC address on pfSense. This provides centralised management of all IP addresses but also ensures my FreeNAS box is allocated the same IP everytime.
If you haven’t configured pfSense similarly, complete the default gateway and name server fields as required by your network. - Click Save
Verify DNS works by Navigating to Shell in the left side column and verify you can perform a nslookup <domain> command, for example
[admin@freenas] /% nslookup freenas.org
Server:		192.168.71.1
Address:	192.168.71.1#53

Non-authoritative answer:
Name:	freenas.org
Address: 64.62.136.60
Create ‘admin’ user
Best practice dictates we disable root logins and provide an admin user to manage FreeNAS with.
Navigate to Account > Users > Add User and enter the following data
- User ID : 1001
- Username: admin
- Create new primary group for user: [√]
- Primary group:
---- - Create home directory in: /nonexistent
- Shell: csh
- Full Name: administrator
- Email: your email account
- Password: a strong password
- Password confirmation: a strong password again
- Disable password login: [ ]
- Lock user: [ ]
- Permit sudo: [√]
- Microsoft Account: [ ]
- SSH Public Key: [ ]
- Auxiliary Groups = Leave blank
- Click OK to save
Configure SSH access
Navigate to Services > SSH
Enter the following to enable SSH access.
- TCP port : 22
- Login as root with password: [ ]
- Allow Password authentication: [√]
- Allow TCP port forwarding: [ ]
- Compress Connections: [ ]
- Click OK to save and enable
Navigate to Services > Control Services and switch SSH on.
You should now be able to login with the user ‘admin’, note root user login is disabled so you will need to specify the username as part of the connect command. For example, on a Mac using Terminal, -l allows us to specify the login user as ‘admin’.
$ ssh freenas -l admin
admin@freenas's password:
Last login: Sun Jan 31 14:24:10 2016 from 192.168.71.106
FreeBSD 9.3-RELEASE-p28 (FREENAS.amd64) #0 r288272+f229c79: Sat Dec 12 11:58:01 PST 2015

    FreeNAS (c) 2009-2015, The FreeNAS Development Team
    All rights reserved.
    FreeNAS is released under the modified BSD license.

    For more information, documentation, help or support, go here:
    http://freenas.org
Welcome to FreeNAS

[admin@FREENAS] /%
Before we can configure e-mail for our admin user, we need to give the root user a valid email address too. Navigate to Account > Users > View Users, highlight ‘root’ and then select ‘Change E-mail’.
- Set E-mail address to an address you will be able to monitor frequently & easily.
- Click ‘OK’ to save.
We can now set up our admin user, navigate to System > Email and enter the details of your SMTP server as required. These are Google’s default SMTP settings for reference.
- From email = admin@freenas.local
- outgoing mail server = smtp.gmail.com
- Port to connect to = 465
- TLS/SSL: = SSL
- Use SMTP authentication = [√]
- username = your Gmail account, i.e user@gmail.com
- password = your Gmail password
- password confirmation = your Gmail password again.
Once you have entered all your info you should select ‘ Send Test Mail’ to verify this is working. After a short while, you should receive an email from the admin@freenas.local user.
Configure UPS
Running a fileserver without a safe means of providing power during an outage to enable safe shutdown is very likely to end in corrupted data. FreeNAS makes extensive use of all available RAM for caching so the risk is significant.
My advice is simple. Do not risk any non-disposable data to a FreeNAS system that isn’t powered by a UPS capable of providing adequate runtime and properly configured to shutdown in an emergency.
I use a APC SMT1500 2u UPS which provides in excess of an hours power for my FreeNAS box. The UPS is connected via a APC AP9630 network connection to pfSense which provides UPS power status via my LAN to a number of devices which are configured to power down should power be lost for a certain time period.
The configuration below assumes you are also running a NUT master. It is possible to connect FreeNAS directly to the UPS via a USB connection but this is outside the scope of this guide for the time being.
Navigate to Services > UPS
- UPS Mode: Slave
- Identifier: UPS1
- Remote Host: 192.168.71.1
- Remote port: 3493
- Description: UPS
- Shutdown mode: Goes on battery
- Shutdown Timer: 600 (Number of seconds after going on battery will shutdown be initiated)
- Minitor user: apc
- Monitor password:
********** - Send Email Status Updates: [√]
- To email: Your email address
- Email subject: UPS report generated by %h (%h is replaced with hostname)
- Power off UPS: [ ] Not enabled as my UPS is powered off after everything else has shutdown by pfSense.
- Click OK to Save.
Navigate to Services > Control Services and turn UPS on.
Its possible to verify everything is working by navigating to the Shell and entering the uspc command, for example
[admin@FREENAS] /mnt% upsc ups1@192.168.71.1:3493
device.mfr: APC
device.model: Smart-UPS 1500 RM
device.serial: AS**********
device.type: ups
driver.name: snmp-ups
ups.load: 41.60
ups.mfr: APC
ups.mfr.date: 01/08/08
ups.model: Smart-UPS 1500 RM
ups.serial: AS**********
ups.status: OL
ups.temperature: 27.00
ups.test.date: 12/27/2015
ups.test.result: Ok
Configure S.M.A.R.T testing
First of all its worth taking a look at the bigger picture of how a combination of short and long term SMART tests in collaboration with regular scrubs can provide a secure storage environment that can provide early warning of possible issues. By regularly reviewing the results of these tests you can identify a hard disk is starting to fail before it actually fails providing you with the best chance of securing your data before any emerging problems can do it any harm.
Before you finalise your own personal testing schedule, its worth getting an understanding of the expected durations of both short and long SMART tests. You accomplish this with sudo smartctl -c /dev/ada1 (obviously replacing ad0 with your own drive identifier). In the output you’ll see the following section about half way down, these values will help you fine tune your test start times versus your periods of heavy activity when you wouldn’t want users to experience any degradation in performance.
Short self-test routine
recommended polling time:    (   2) minutes.
Extended self-test routine
recommended polling time:    ( 517) minutes.
Conveyance self-test routine
recommended polling time:    (   5) minutes.
Here’s how a month looks from a macro testing perspective.
+===================+=====+=====+=====+=====+=====+=====+=====+=====+=====+=====+=====+=====+=====+=====+=====+=====+=====+=====+=====+=====+=====+=====+=====+=====+=====+=====+=====+=====+=====+=====+=====+
|task          day->|01   |02   |03   |04   |05   |06   |07   |08   |09   |10   |11   |12   |13   |14   |15   |16   |17   |18   |19   |20   |21   |22   |23   |24   |25   |26   |27   |28   |29   |30   |31   |
+===================+=====+=====+=====+=====+=====+=====+=====+=====+=====+=====+=====+=====+=====+=====+=====+=====+=====+=====+=====+=====+=====+=====+=====+=====+=====+=====+=====+=====+=====+=====+=====+
|boot scrub         |01:00|     |     |     |     |     |     |     |     |     |     |     |     |     |     |01:00|     |     |     |     |     |     |     |     |     |     |     |     |     |     |     |
+-------------------+-----+-----+-----+-----+-----+-----+-----+-----+-----+-----+-----+-----+-----+-----+-----+-----+-----+-----+-----+-----+-----+-----+-----+-----+-----+-----+-----+-----+-----+-----+-----+
|pool scrub         |02:00|     |     |     |     |     |     |     |     |     |     |     |     |     |     |02:00|     |     |     |     |     |     |     |     |     |     |     |     |     |     |     |
+-------------------+-----+-----+-----+-----+-----+-----+-----+-----+-----+-----+-----+-----+-----+-----+-----+-----+-----+-----+-----+-----+-----+-----+-----+-----+-----+-----+-----+-----+-----+-----+-----+
|long smart test    |     |     |     |     |     |     |     |02:00|     |     |     |     |     |     |     |     |     |     |     |     |     |     |02:00|     |     |     |     |     |     |     |     |
+-------------------+-----+-----+-----+-----+-----+-----+-----+-----+-----+-----+-----+-----+-----+-----+-----+-----+-----+-----+-----+-----+-----+-----+-----+-----+-----+-----+-----+-----+-----+-----+-----+
|short smart test   |     |     |     |06:00|     |     |     |     |     |     |     |06:00|     |     |     |     |     |     |     |06:00|     |     |     |     |     |     |06:00|     |     |     |     |
+-------------------+-----+-----+-----+-----+-----+-----+-----+-----+-----+-----+-----+-----+-----+-----+-----+-----+-----+-----+-----+-----+-----+-----+-----+-----+-----+-----+-----+-----+-----+-----+-----+
|send smart report  |     |07:00|     |     |07:00|     |     |     |07:00|     |     |     |07:00|     |     |     |07:00|     |     |     |07:00|     |     |07:00|     |     |     |07:00|     |     |     |
+-------------------+-----+-----+-----+-----+-----+-----+-----+-----+-----+-----+-----+-----+-----+-----+-----+-----+-----+-----+-----+-----+-----+-----+-----+-----+-----+-----+-----+-----+-----+-----+-----+
|send zpool report  |     |07:01|     |     |     |     |     |     |     |     |     |     |     |     |     |     |07:01|     |     |     |     |     |     |     |     |     |     |     |     |     |     |
+-------------------+-----+-----+-----+-----+-----+-----+-----+-----+-----+-----+-----+-----+-----+-----+-----+-----+-----+-----+-----+-----+-----+-----+-----+-----+-----+-----+-----+-----+-----+-----+-----+
Configure short tests
Navigate to Tasks > S.M.A.R.T Test
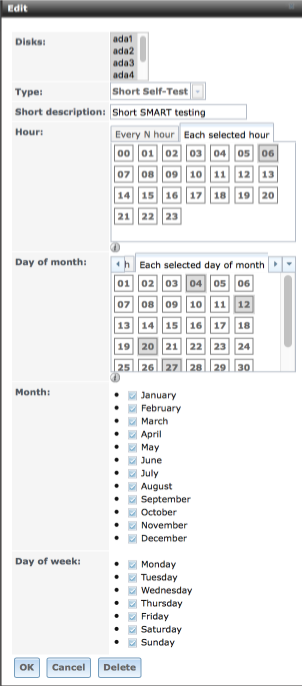
Add S.M.A.R.T test and configure options as follows:-
- Disks = Select all your hard disks
- Type = Short Self Test
- Short description = Short SMART testing
- Hour = Select
Each selected hourtab
- select06to initiate the test at 6am. - Day of month = Select
Each selected day of month
- select4, 12, 20 & 27to perform the tests on those dates - Month = Tick all months
- Day of week = Tick all days
- Click Ok
Here’s what your SMART test panel should look like
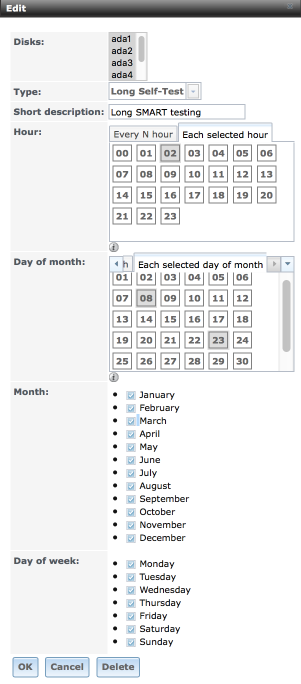
Configure long tests
Navigate to Tasks > S.M.A.R.T Test
Add S.M.A.R.T test
- Disks = Select all your hard disks
- Type = Long Self Test
- Short description = Long SMART testing
- Hour= Select
Each selected hourtab
- select02for 2am - Day of month = Select
Each selected day of monthtab
- Select8 & 23 - Month = Tick all months
- Day of week = Tick all days
- Click Ok
Here’s what your SMART test panel should look like
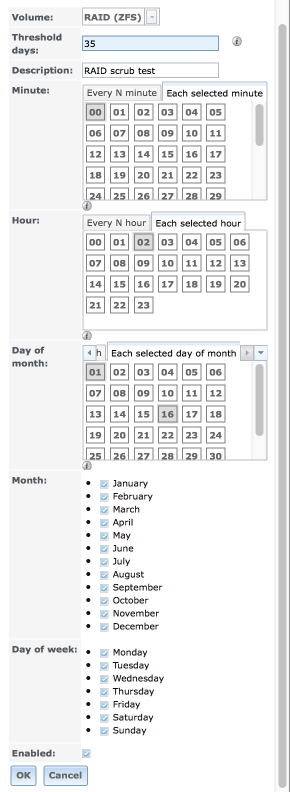
Configure scrubs
Navigate to Storage > Scrubs and select View Scrub. Highlight the scrub allocated to Volume called RAID and select edit. Complete the form with the following options:
- Volume = RAID (ZFS)
- Threshold days = 10
- Description = RAID volume scrub
- Minute = Select
Each selected minuteand highlight00 - Hour = Select
Each selected hourand highlight02 - Day of month = Select
Each selected day of month and highlight01&16 - Month = Tick all months
- Day of week = Tick all days
- Enabled = ticked
- Select OK
Configure S.M.A.R.T. reporting
Open up the Services menu on the left and highlight ‘S.M.A.R.T.’. We will configure FreeNAS to send an email if any drive temperatures rise above 37 degrees. I established this value primarily from the following articles by Google and Backblaze who both have enough data points to be able to speak from significant experience.
Google’s Failure trends in a Large Disk Drive Population
Backblaze’s reliability stats of Q3 2015
Backblaze’s raw data access
Navigate to Services > S.M.A.R.T. and configure the panel as follows:-
- Check Interval: 30
- Power mode: Never - Check device regardless of its power mode
- Difference: 0
- Informational: 0
- Critical: 37
- Select ‘OK’ to save.
Navigate to Services > Control Services and switch S.M.A.R.T on.
I would suggest this is an important stage so its worth verifying by setting an value into the critical field to validate the email notification is being sent. For example, I set it to 25 and within a short time period had an email in my inbox and the red alert warning flashing in the GUI advising of a problem.
Device: /dev/ada6 [SAT], Temperature 35 Celsius reached critical limit of 25 Celsius (Min/Max ??/35)
Device: /dev/ada4 [SAT], Temperature 35 Celsius reached critical limit of 25 Celsius (Min/Max ??/35)
Device: /dev/ada1 [SAT], Temperature 33 Celsius reached critical limit of 25 Celsius (Min/Max ??/33)
Device: /dev/ada2 [SAT], Temperature 35 Celsius reached critical limit of 25 Celsius (Min/Max ??/35)
Device: /dev/ada5 [SAT], Temperature 35 Celsius reached critical limit of 25 Celsius (Min/Max ??/35)
Device: /dev/ada3 [SAT], Temperature 33 Celsius reached critical limit of 25 Celsius (Min/Max ??/33)
Additional scripts
Generate Config Backups
To ensure your configuration is safe and protected its beneficial to run a daily cron job to copy the current FreeNAS configuration file into a folder on your pool. We are going to do this configuration in the Shell so first SSH into your FreeNAS box.
Create a location for some user scripts.
mkdir /mnt/RAID/.scripts
cd /mnt/RAID/.scripts
Now lets create the script itself
sudo ee BackupConfig.sh
Paste the following line into this file.
cp /data/freenas-v1.db /mnt/RAID/.scripts/ConfigBackups/`date +%Y%m%d`_`cat /e
Make the file executable
chmod +x BackupConfig.sh
and create a directory for it to store the backups in
mkdir /mnt/RAID/ConfigBackups
Next we setup a cron job to automatically run this script everyday at 11:55pm
Navigate in the GUI to Tasks > Cron Jobs > Add Cron Job
Enter the following
- User: root
- Command:
sh /mnt/RAID/.scripts/BackupConfig.sh - Short Description: Daily Config Backup
- Minute: Select ‘Each Selected Minute’ and highlight
55 - Hour: Select
Each Selected Hourand highlight23 - Day of month: Select
Every N day of monthand select1 - Month: Select all months
- Day of week: Select all days.
- Redirect Stdout: [√]
- Redirect Stderr: [ ]
- Enabled: [√]
- Click ‘Ok’ to save.
Even though the backup files are sall, its stil worth reviewing this folder regularly to prune it of old files.
SMART mail report
Its worth paying close attention to SMART attributes of all of your disks. Theres an active thread on the FreeNAS forums here where some useful scripts created by BiduleOhm are being developed. To implement the SmartReport script which will email you a summary of daily SMART stats:
cd /mnt/RAID/.scripts
ee SmartReport.sh
Paste the contents of the script from here into this file. Note that you will need to enter your email address and drive identifiers into the top of the script.
Save, Exit and verify it runs by entering
sudo ./SmartReport.sh
If all has gone well, you should receive a mail with your drives SMART details.
Next we add a cron job to execute this script per our schedule above. Navigate in the GUI to Tasks > Cron Jobs > Add Cron Job
- User: root
- Command:
sh /mnt/RAID/.scripts/SmartReport.sh - Short Description: Daily Config Backup
- Minute: Select ‘Each Selected Minute’ and highlight
00 - Hour: Select
Each Selected Hourand highlight07 - Day of month: Select
Each selected day of monthand select2, 5, 9, 13, 17, 21, 24, 28 - Month: Select all months
- Day of week: Select all days.
- Redirect Stdout: [√]
- Redirect Stderr: [ ]
- Enabled: [√]
- Click ‘Ok’ to save.
You should start receiving regular emails with SMART status reports contained within. Keep an eye on them and watch for signs that any of your drives may be about to develop a fault.
Summary
That should provide you with a suitable configuration to build upon for whatever your purpose is.