FreeNAS Crashplan installation
Last revised: 9 April 2016.
Introduction
Even though this guide installs the latest 4.6.0 version of Crashplan, we are going to build upon the foundations provided by the older existing FreeNAS Crashplan 3.6.3_1 plugin. Updating the earlier v3.6.0 plugin provides the quickest, easiest and least troublesome method I’ve found of installing a reliable Crashplan into FreeNAS. Alternative methods such as installing from the ports tree or enabling Linux compatability and downloading the Linux verison direct from Code42 proved to be more convoluted.
At the end of this guide you will have configured a up to date Crashplan plug in, have enabled encryption and backed up a folder to Crashplans cloud storage space.
Install the plugin
Log in to FreeNAS control panel and navigate to Plugins in the top menu bar.
Highlight Crashplan and click Install at the bottom of the page
Accept Crashplan EULA
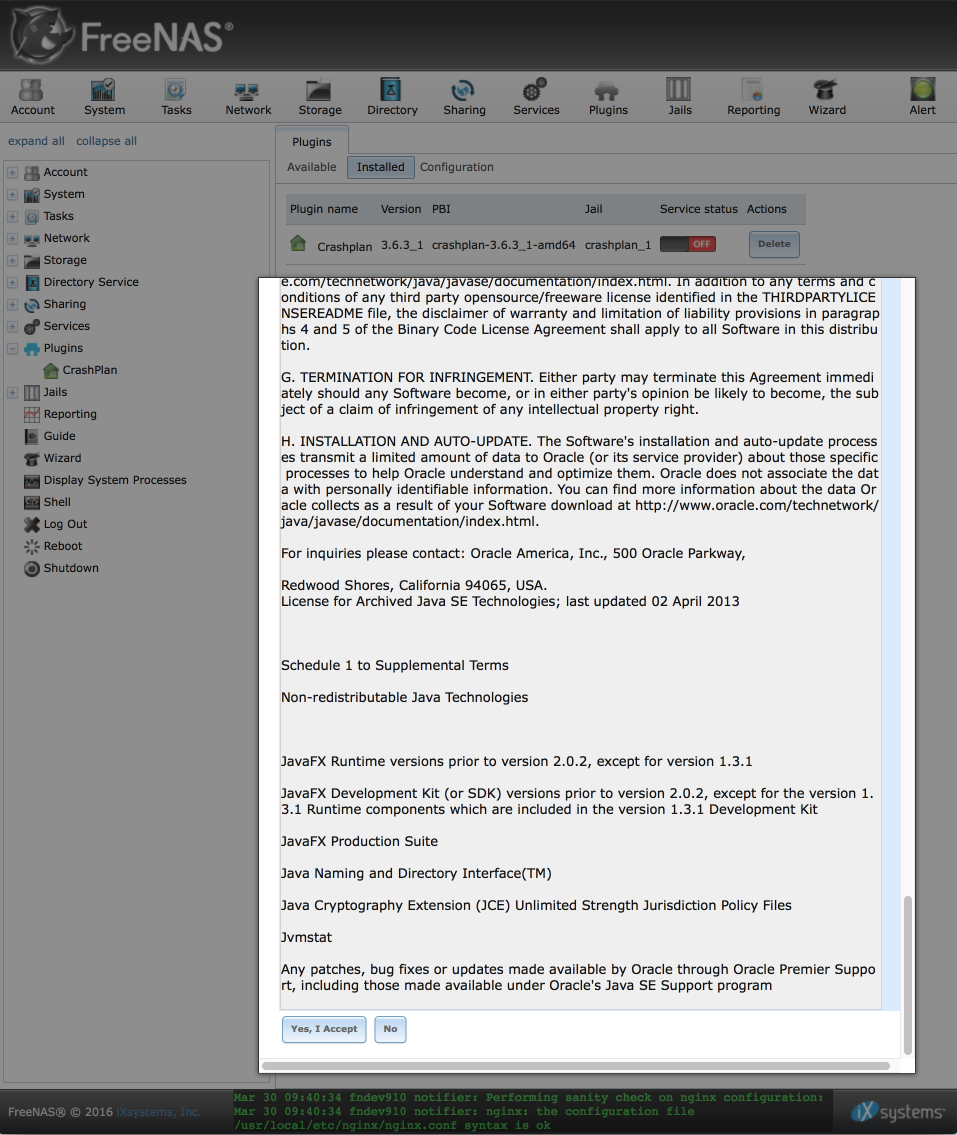
Before you can start the Crashplan plugin, you need to accept the EULA. Navigate to Plugins (this time in the left hand column) > Crashplan.
You should see the EULA displayed, read through it and if you are satisfied with the conditions, proceed to click on ‘Yes, I accept’ at the bottom of the page.
Close the popup that redirects you to a link informing you how to connect to a headless crashplan desktop. You can close this, we will configure this later on.
Enable plugin
Once we have accepted the EULA, we can start the Crashplan engine.
Navigate to Plugins > Installed and enable the Crashplan service by toggling the service status switch.

Enable SSH access
We’ll do most of the upgrade to version 4.6.0 through the shell and to make things easier we will enable the ability to log in with our preferred SSH client.
Enable SSH access
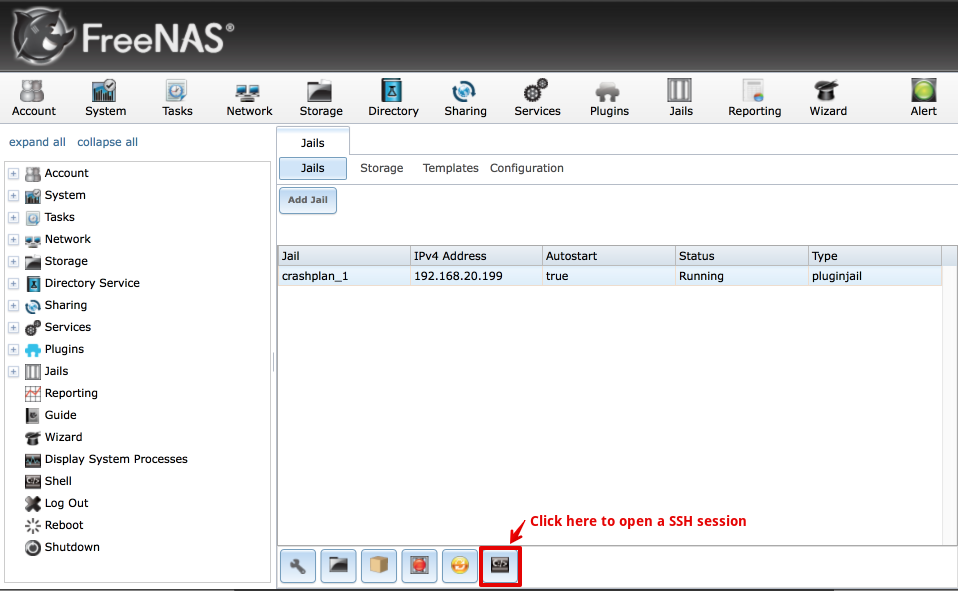
Navigate to Jails, highlight the Crashplan jail and click on the Command prompt icon.
Enter the following command to edit the systems configuration information
ee /etc/rc.conf
and make the following change
- sshd_enable=”NO” to sshd_enable=”YES”
- Press Escape, then return, select ‘a) save changes’ and press return again to exit.
Start the shell service
Start the Shell service by entering the following command
service sshd start
you should see the service enable and a number of secure keys generated.
root@crashplan_1:/ # service sshd start
Generating RSA1 host key.
2048 SHA256:4F5l0QqwkxvMbk0phpRS7MRvEa4WU6ExBwkzMOMei1M root@crashplan_1 (RSA1)
Generating RSA host key.
2048 SHA256:itcOMrDFUECVfvRee1bR5Nct+ug9FQVEXg0/H5WkwEc root@crashplan_1 (RSA)
Generating DSA host key.
1024 SHA256:TDEEg7w0lnarsj4OYyNEiNDVWHj7gl15SDNUT0PwoVw root@crashplan_1 (DSA)
Generating ECDSA host key.
256 SHA256:K6SMSjRVkfpChFmn7h87m4ObRMcBZiUrg+dxEwfg62Y root@crashplan_1 (ECDSA)
Generating ED25519 host key.
256 SHA256:r9XAOXbwvnhh06SBHM36KJieQZ3IQwQaMDTKZXhUpHI root@crashplan_1 (ED25519)

Performing sanity check on sshd configuration.
Starting sshd.
root@crashplan_1:/ #
Create a Crashplan user
We will now create a user who will be able to log in to our Crashplan jail. At the command prompt, enter adduser . I’ve summarised the options below we will use, other than the name, password and most importantly, the invitation to the ‘wheel’ group, everything else will be as default.
- Username: cp
- Fullname: empty
- Uid: empty
- Login group [cp]: default
- Invite cp into other groups?: wheel
- Login class [default]: default
- Shell [sh]: default
- Home directory [/home/cp]: default
- Home directory permissions: default
- Use password based authentication: [yes]: default
- Use an empty password [no]: default
- Use a random password [no]: default
- Enter password: strongpassword
- Enterpasswordagain: strongpasswordagain
- Lock out the account after creation [no]: default
When done, before accepting the request, verify the data is displayed correctly, i.e
Username   : cp
Password   : ************
Full Name  :
Uid        : 1001
Class      :
Groups     : cp wheel
Home       : /home/cp
Home Mode  :
Shell      : /bin/sh
Locked     : no

OK? (yes/no):
Once confirmed as correct, type yes and press return.
Set a secure root password
At the command prompt enter passwd
Enter a strong password twice to ensure our root account is secured.
Open a SSH session
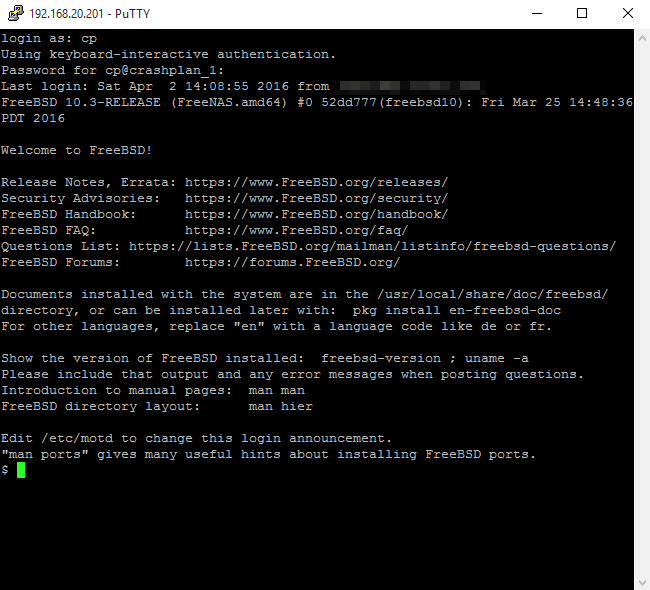
Before you close the FreeNAS window, verify everything is working correctly by opening a shell session with the user we have just created. Launch your terminal program and enter the following command:
ssh cp@192.168.20.199
The IP address is the address of the Crashplan jail, not Freenas itself, in my case 192.168.20.199. The cp before the ‘@’ sign signifies to login with the user account we just created, i.e ‘cp’.
Update Crashplan files to latest version
We’ll now proceed to update the default and old v3.6.3 of Crashplan which is installed as part of the plugin with the latest version from Code42, currently at v4.6.0.
Stop Crashplan service
Before we start to update the Crashplan server, let switch to the root account and make sure the Crashplan service is stopped.
$ su
Password:**********
# service crashplan stop
Stopping CrashPlan Engine ... OK
Download, extract and replace old files with Crashplan 4.6.0
Change working folder into your home folder
$ cd ~
Download the latest version (currently 4.6.0 )from Code42’s website.
$ wget --no-check-certificate http://download.code42.com/installs/linux/install/CrashPlan/CrashPlan_4.6.0_Linux.tgz

Resolving download2.code42.com (download2.code42.com)... 216.17.8.57
Connecting to download2.code42.com (download2.code42.com)|216.17.8.57|:443... connected.
HTTP request sent, awaiting response... 200 OK
Length: 41965448 (40M) [application/octet-stream]
Saving to: 'CrashPlan_4.6.0_Linux.tgz'

CrashPlan_4.6.0_Linux.tgz         100%[============================================================>]  40.02M  7.21MB/s   in 6.2s

2016-04-02 13:44:58 (6.50 MB/s) - 'CrashPlan_4.6.0_Linux.tgz' saved [41965448/41965448]
Unzip the packed file
$ tar -xf CrashPlan_4.6.0_Linux.tgz
Extract the Crashplan files from the Crashplan
$ cd crashplan-install

$ cpio -id < CrashPlan_4.6.0.cpi
104748 blocks
Delete the default plugins v3.6.3 files…
$ rm -r /usr/pbi/crashplan-amd64/share/crashplan/lib*
…and replace with the freshly extracted and up to date 4.6.0 versions
$ cp -r lib* /usr/pbi/crashplan-amd64/share/crashplan/
We should now be able to start the Crashplan service
$ service crashplan start
Starting CrashPlan Engine ... Using standard startup
OK
Verify the service has started correctly and it is listening on ports 4242 and 4243. If this isnt working, troubleshoot throught he previous steps as without the service listening you won’t be able to proceed with the configuration.
$ netstat -na | grep 42
tcp4       0      0 *.4243                 *.*                    LISTEN
tcp4       0      0 *.4242                 *.*                    LISTEN
This is a good time to make a record of your servers authentication token as you will need this in the client configuration stage later. Its obtained from the ‘.ui_info’ file as follows.
$ cat /var/lib/crashplan/.ui_info
4243,aead82dd-1c9f-41e9-98e1-1fdg3567f40c,0.0.0.0
This is in the format port number, authentication token, IP address.
Configure our headless server with Windows 10 client
Now the server component is up and running, we can proceed to configure it from a remote PC. I’m using Windows for this example but a Mac or Linux box will work too although the actual method of connecting may vary slightly.
Download & install Crashplan client
Log into your Windows PC and download and install the Crashplan program from Code42 here.
Edit local configuration file
Note: Its worth making a backup of the C:\ProgramData\CrashPlan\.ui_info file in case you ever need to run the Crashplan server locally on your Windows PC.
Open C:\ProgramData\CrashPlan\.ui_info in your favourite text editor.
- Replace the default 4243 port number with 4200
- Replace the authentication token with the one from the FreeNAS jail you noted previously.
- Save chnages & close the file
It appears the Crashplan client can sometimes overwrite this file so its also worth making it read-only to reduce maintenance due to this.
Create a port forward
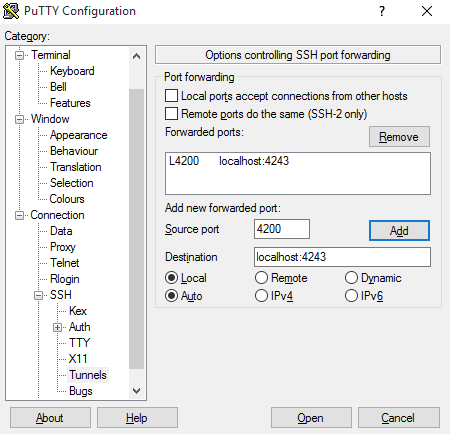
We communicate with the FreeNAS server by creating a port forward from our client PC. We will use the popular and free PuTTY SSH and Telnet client which can be downloaded from here
Navigate to Connection > SSH > Tunnels
Enter the following settings:
- Source port: 4200
- Destination: localhost:4243
- Click Add
Navigate to the Session settings and enter the IP address of the FreeNAS crashplan jail (note, not the FreeNAS server itself)

Click Open to open the SSH tunnel and sign in to the remote computer using the Crashplan jail SSH settings we setup ealier.
Launch the Crashplan client
Now we have created the tunnel, the taskbar icon should turn green and indicate we can go ahead and open the Crashplan application.
Configure folders to backup
Mount folders to Crashplan jail
To enable our Crashplan server to backup files to Crashplan central, we need to expose the desired FreeNAS folders to the Crashplan jail. I’ll demonstrate how to add a single folder (in this case called ‘Data’) and it should be simple enough excercise to replicate for the other folders you want to backup.
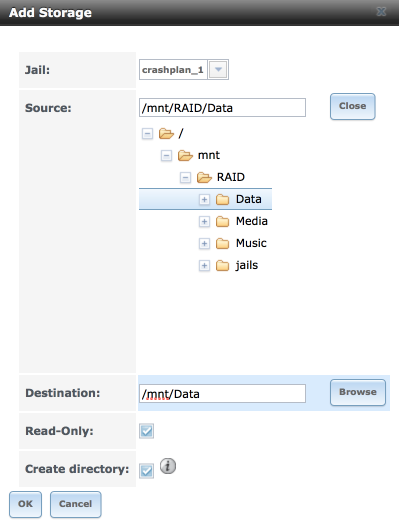
Log in to FreeNAS and navigate to Jails (in the left column) > Crashplan_1 > Storage > Add Storage
- Jail: Will be automatically selected for you.
- Source: Enter the path, or browse to your desired source folder.
- Destination: /mnt/Data
- Read Only: [√]
- Create Directory: [√]
-
Click ‘ok’ to save
- I set Read only as Crashplan shouldn’t be writing to these folders and it’s a sensible precaution.
- Destination folder: I always use ‘/mnt/’ followed by the name of the folder.
- Create directory will create the folder in the jail for us.
Repeat for each folder which you want to mount in the jail.
Add folders to Crashplan client
Head back to the Crashplan client on your PC where we will now ocnfigure some baseline settings.
Navigate to Settings > Backup
- Set verify selection = 1 day & a time when you are not using the server heavily, I use 1am.
- Frequency & Versions = as you desire depending on your use case. I keep the following:
- a daily backup for the last week
- a weekly backup for the last 3 months
- a monthly backup for the last year
- a yearly archive.
- never remove deleted files - Advanced
- Data de-duplication: minimal
- Compression: off
- Encryption enabled: [√]
- Watch file system in real time: [ ] Note:FreeBSD doesnt support this feature currently
- Back up open files [√]
Navigate to Settings > Account
- Enter your account identification key here
- Verify software version running on the server
Navigate to Settings > Security
Unless you are ok with backing up your un-encrypted files to Crashplan, its critical to complete the following field
- Archive Encryption
- Custom Key: Paste your 448-bit key here. Make sure you store it somewhere safe as you will need it to unencrpyt any restored files.
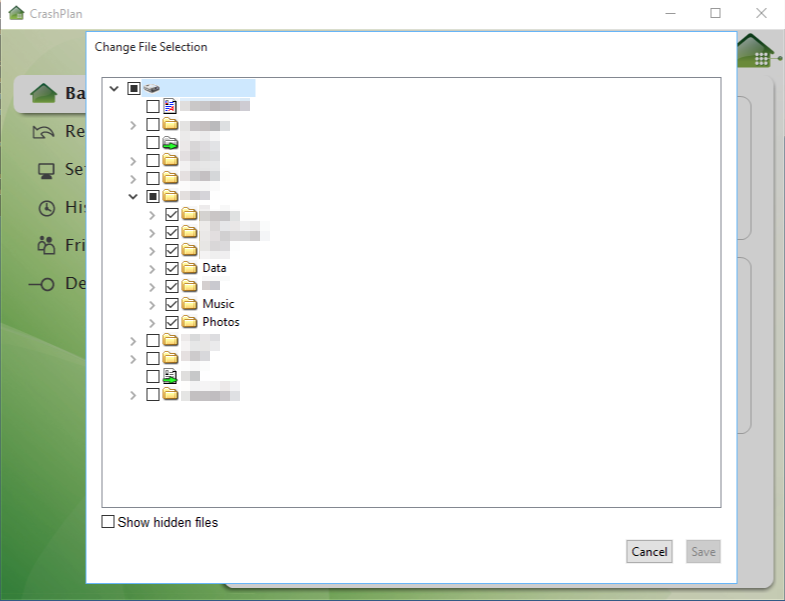
Navigate to Backup > Change
You should see the folders you linked to the jail in the previous step here now.
- Select folders to backup. (In the screenshot below you can see I’ve attached more folders to my system, you will likely only see the Data folder at this time).
Backup…
Assuming everything has been configured correctly, your backup should proceed to start shortly. Depending on the volume of data, it may take some time to backup to Crashplans servers especially if you are on a limited upload capacity line. Its also worth being mindful of any cap’s which are in place on your line to ensure you don’t incurr any additional costs.
…and verify.
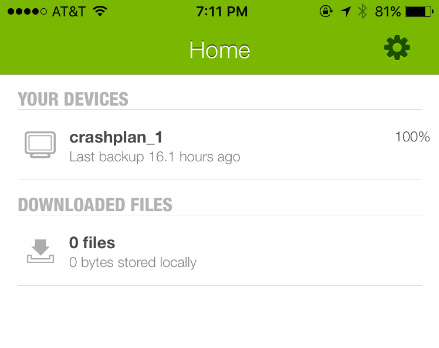
A backup is only any good its contains data which can be retreived. Please check regularly that files are being backed up regularrly. Its critical to also regularly download a sample set of files to ensure you can decrypt and restore them. Its also vital you don’t misplace the encryption key if you use one! Its also worth noting that Crashplan has a habit of upgrading their software from time to time and its possible to end up with the your local servers code out of sync with the Crashplans cloud servers which will usully prevent backups from occuring. I keep an eye on backups from my phone with Crashplans mobile application which is available on both Android and iOS. This is a easy way to check time since last backup and completion.