pfSense 2.3 port forwarding for torrent client.
Published 5 March 2016.
Introduction
This guide covers how to correctly configure the Deluge torrent client to access the torrent network via AirVPN utilising pfSenses port forwarding capability. The guide makes the assumption you already have your Deluge client installed somewhere accessible. I run Deluge within a FreeNAS jail and I intend to put together a guide soon to help with installation for those who need it. This guide continues to build upon the foundations laid previously in my earlier pfSense configuration guides.
Create AirVPN port forward
First thing we need to do is create a port forward within AirVPNs network.
Log into your account at airpn.org and navigate to Client Area > Forwarded ports. You’ll see a option to add a new port forward here which looks something like this.
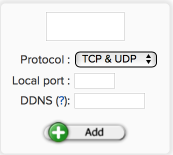
You can pretty much leave this as it is and just click add. Air will assign you a free port automatically. With multiple connections DDNS doesn’t work so feel free to leave that blank too, for torrent use it won’t matter as our client will be configured to use our specific port number anyway.
- Protocol: TCP & UDP
- Local port: blank
- DDNS: [ ]
- Click Add
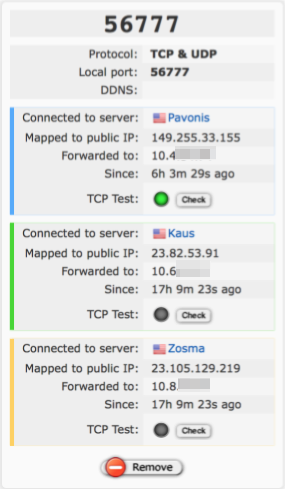
After clicking Add you will see your new port forward summary, make a note of the local port as you will need this later on, in my case its 56777. As my connection makes use of three simultaneous connections to provide some load balancing and failover protection there are three servers represented here.
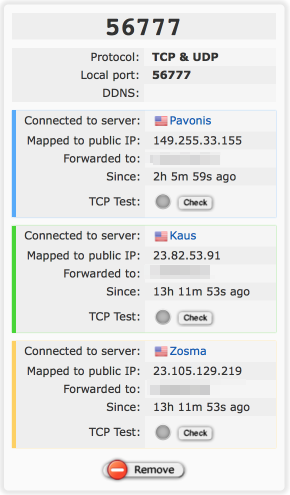
You’ll notice there are three grey circles next to the TCP test button. If you select the TCP test now they will remain grey as there isn’t a port forward in place on our local network to enable a response yet.
Configure pfSense VPN_WAN port forward
First let setup up some basic parameters in aliases which makes life easier if we need to amend anything later on.
Log into pfSense and navigate to Firewall > Aliases > IP
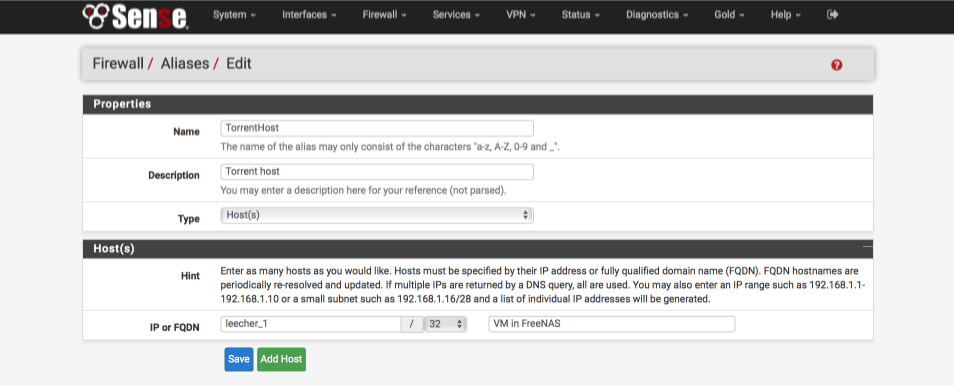
Create a new alias to specify the torrent server
- Click +Add
- Name = TorrentHost
- Description = Torrent host
- Type = Host(s)
- IP or FQDN = IP address of your torrent machine, or if you have local DNS resolution, the FQDN.
- Click Save
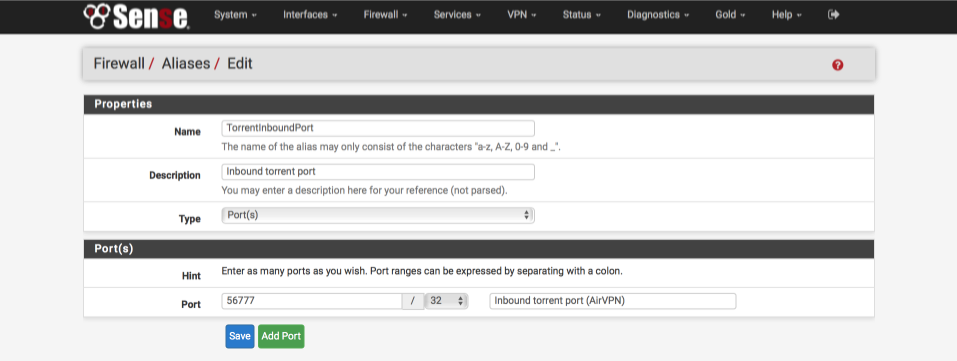
Navigate to Firewall > Aliases > Ports
Create a new alias to specify the torrent client port
- Click +Add
- Name = TorrentInboundPort
- Description = Inbound torrent port
- Type = Port(s)
- Port = the number of the port allocated from AirVPN, in my case it was 56777.
- Comment = Inbound torrent port (AirVPN)
- Click Save
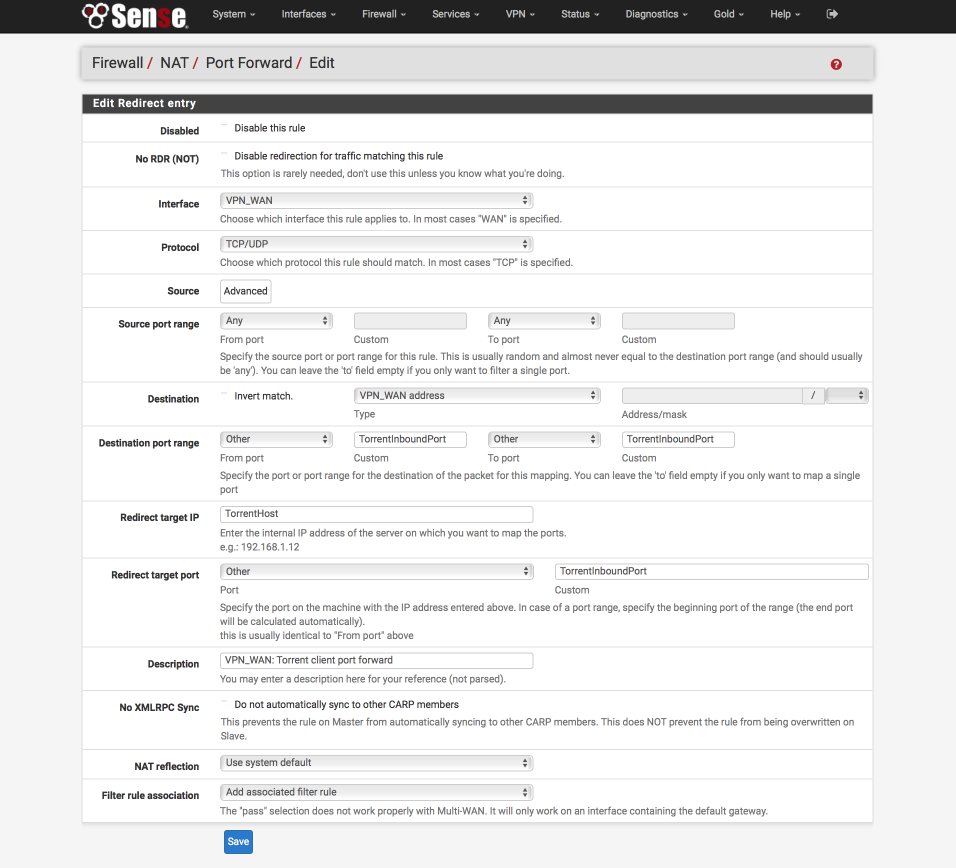
Set up the VPN_WAN port forward
Now we’ll set up the port forward for our first VPN tunnel.
Navigate to Firewall > NAT > Port Forward
- Click Add
Configure rule as follows:
- Disabled = [ ]
- Interface = VPN_WAN
- Protocol: TCP/UDP
- Source from port: Any
- Source to port: Any
- Destination = VPN_WAN address
- Destination from port: TorrentInboundPort
- Destination to port: TorrentInboundPort
- Redirect target IP: TorrentHost
- Redirect target port: Other, TorrentInboundPort
- Description: VPN_WAN: Torrent client port forward
- No XMLRPC: [ ]
- NAT refection: Use system default
- Filter rule association: Add associated filte rule
- Click Save & Apply
Verify your port forward rule summary looks like this
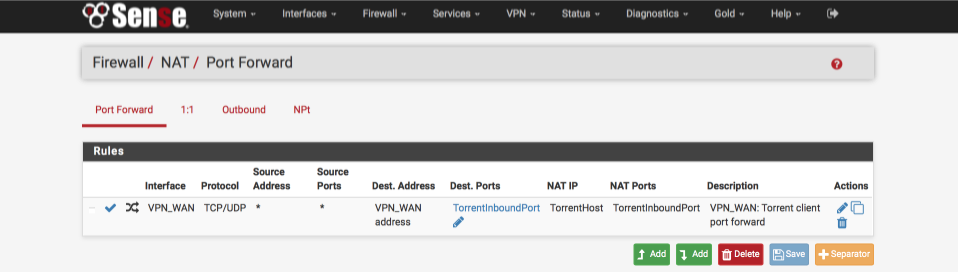
As part of creating this forward, an associated firewall rule was created in the VPN_WAN interface we specified.
Navigate to firewall > rule > VPN_WAN
- Mouse over the port forward rule and move it above the default blocks. Remember rules are processed from top to bottom so the order is important.
- Save & Apply
Verify your firewall rules look like this

Configure Deluge client to use the forwarded port.
I’m going to focus on setting up the ports rather than the whole Deluge client here as your setup may require some subtle differences from mine depending on which tracker you use.
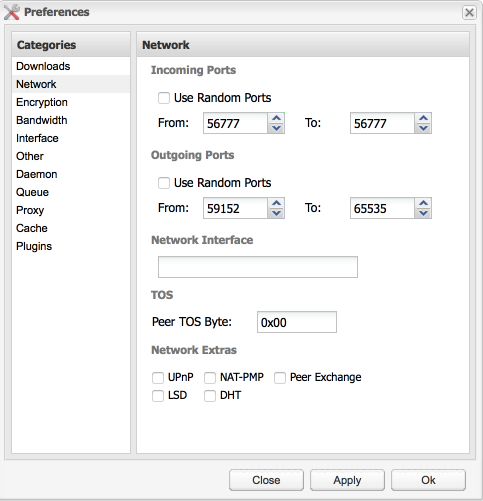
Load up your Deluge client and navigate to preferences > Network. Set the interface up as follows:-
- Incoming Ports
- Use Random Ports = [ ]
- From: 56777
- To: 56777 - Outgoing Ports
- Use Random Ports - [ ]
- From: 59152
- To: 65535 - Network Interface = Empty
Verify VPN_WAN port forward functionality
Head back to AirVPN > Client Area > Forwarded ports.
- Select check besides your VPN_WAN connection server.
- Verify the grey circle turns green signalling the port forward is configured correctly.
Duplicate VPN_WAN settings to other VPN interfaces
To provide some load balancing and failover protection, lets make use of our three VPN tunnels and enable them all to handle torrent traffic.
Log back in to pfSense and navigate to Firewall > NAT > Port forwards
We know that existing port forward works correctly so lets duplicate it to the two other VPN interfaces.
- Click the duplicate icon under actions to the right of the VPN_WAN rule to create a duplicate rule.
make the following changes to the duplicate rule
- Interface = VPN2_WAN
- Destination = VPN2_WAN address
- Description = VPN2_WAN: Torrent client port forward
- Click Save & Apply
Now make another duplicate for VPN_WAN3, click the duplicate icon next to the VPN_WAN rule again but this time make the following changes
- Interface = VPN3_WAN
- Destination = VPN3_WAN address
- Description = VPN3_WAN: Torrent client port forward
- Click Save & Apply
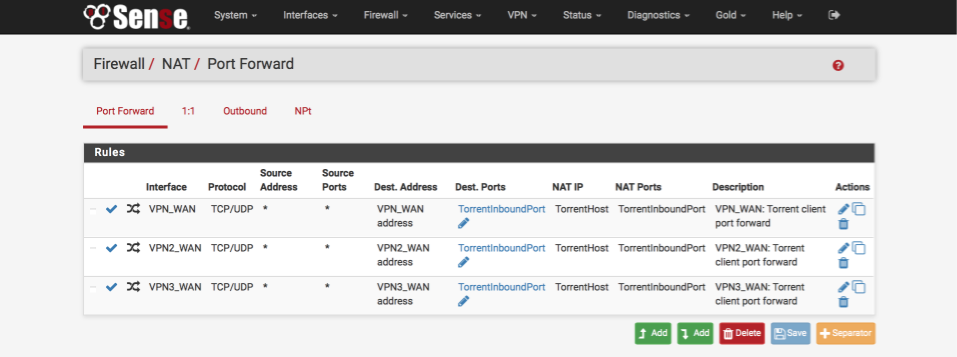
Verify your port forward rules look like this when complete
Adjust VPN2_WAN and VPN3_WAN firewall rules
We need to make a similar adjustment to the firewall rule ordering for those two new port forward rules which have been created.
Navigate to firewall > rule > VPN2_WAN
- Mouse over the port forward rule and move it above the default blocks.
- Save & Apply
and again for VPN3_WAN, navigate to firewall > rule > VPN3_WAN
- Mouse over the port forward rule and move it above the default blocks.
- Save & Apply
Verify additional port forwards
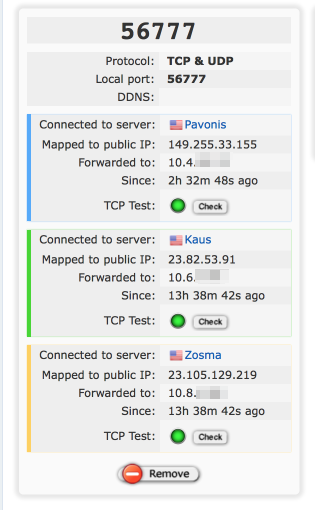
Head back to AirVPN > Client Area > Forwarded ports.
- Select ‘Check’ besides your VPN2_WAN and VPN3_WAN connection servers.
- Verify the grey circles all turn green signalling the port forwards are all configured correctly.
Verify torrent functionality and performance
Load up Deluge again and initiate a download. Verify that the three gateways are handling traffic correctly and performance is in line with your ISP line speeds etc.
Here’s a image from my Deluge setup verifying I am seeing 17MiB/s, as fast as my ISP’s line will go on my current subscription plan.

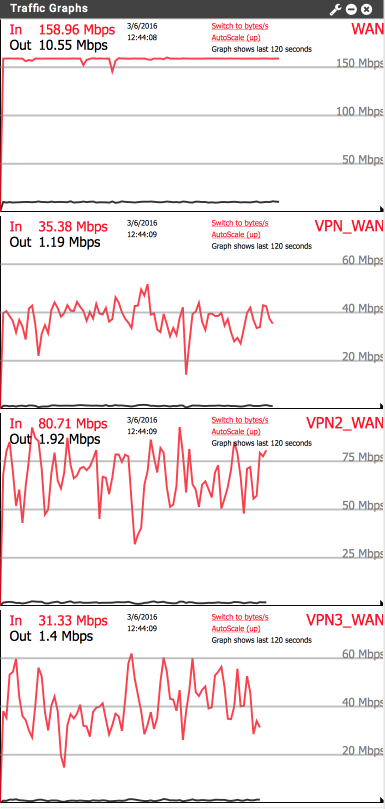
Here’s the pfSense gateway traffic demonstrating the download spread over three VPN connections and the WAN being fully saturated.