Proxmox Linux VM baseline
Last revised 31 July 2016.
Contents
Introduction
I wanted to create a guide covering creating a basic Linux VM that could be extended for the other application guides I plan on creating. Regardless of the specific applications needs, a lot of the basic functionality is the same and therefore it makes sense to avoid repeating the information in each guide.
I personally like Debian and have recently been using the CrunchBangPlusPlus distro which is built upon Debian Jessie and configured with Openbox window manager as well as a number of other useful additions without introducing a lot of excess bloat. My preference is to stay with a lightweight Linux setup which helps keeps the resource requirements down to a reasonable minimum and reduce the burden on the host machine.
This guide will build on my Proxmox 4.2 baseline installation which ensures the underlying host configuration is configured correctly to support reliable usage including UPS initiated shut-downs, correct network time synchronisation and email reporting etc.
Prepare Proxmox
Download CrunchBangPlusPlus iso
Download the CrunchBangPlusPlus ISO image from here.
Upload ISO to Proxmox
Upload the ISO file to Proxmox.
- Navigate to StorageView > DataCenter > Proxmox > Local (Proxmox), select Content and then click Upload.
- Select the CrunchBangPlusPlus.ISO file you just downloaded and click Upload to transfer it to the Proxmox host.
Create VM
- Navigate to ServerView > DataCenter > Proxmox
- Click ‘Create VM’ in the topmost menu bar.
Setup VM
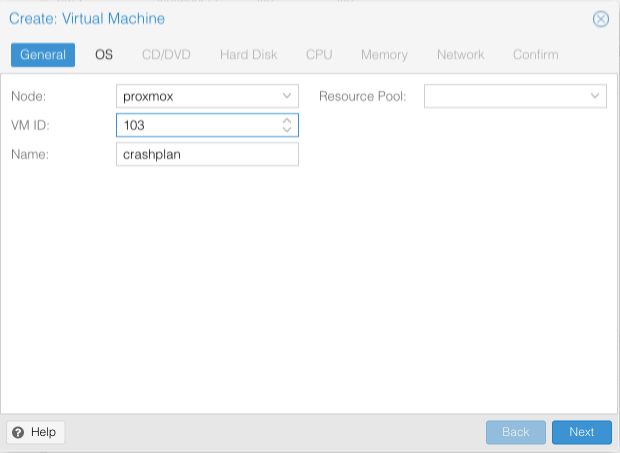
- Node = proxmox
- VM ID = a unique ID number
- Name = a unique VM name
- Resource pool = blank
- Click Next
Setup the VM type

- Select Linux 4.X/3.X/2.6 Kernel
- Click Next
Setup the VM image source
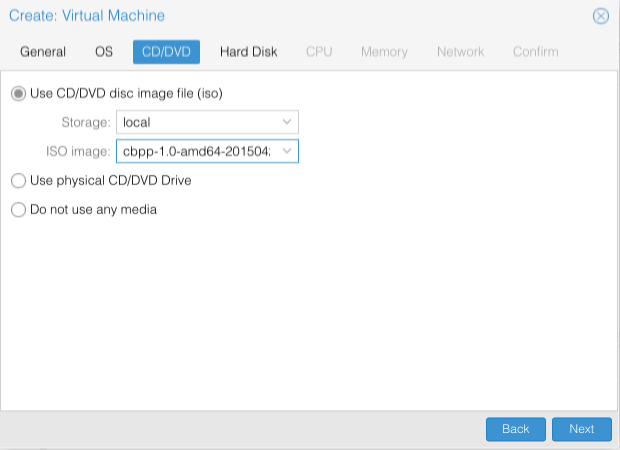
- Select Use CD/DVD disc image (iso)
- Storage = local
- ISO image = Highlight the the CrunchBangPlusPlus.iso you uploaded to Proxmox.
- Click Next
Setup the VM hard disk type and capacity
Allocate enough space to cover your intended VM requirements. Its easy to increase the disk space allocation later and slightly less easy to reduce it.

- Bus = VirtIO, Device = 0
- Storage = local-lvm
- Disk Size (GB) = Required disk size
- Cache - Default (No cache)
- No Backup = [ ]
- Discard = [ ]
- IO thread = [ ]
- Click Next
Setup the VM CPU
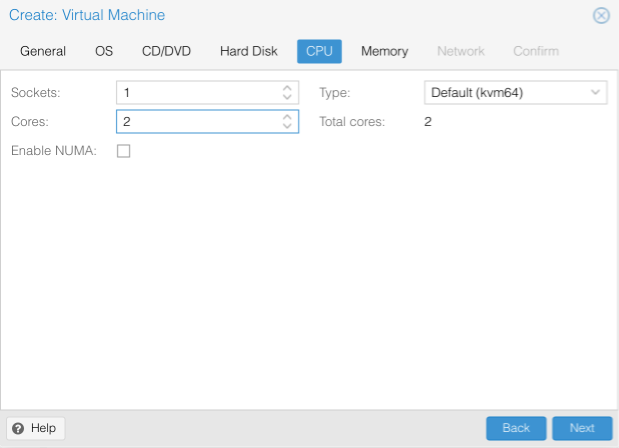
Allocate Sockets & cores depending on the processing requirements of the VMs intended purpose.
- Sockets = Number of sockets
- Cores = Number of cores
- Enable NUMA = [ ]
- Type = Default (kvm64)
- Total Cores = Sum of cores to be allocated
- Click Next
Setup the VM memory configuration
Allocate enough memory to support the needs of the intended VM purpose. I personally prefer to manage my host machine resources closely and set a fixed size memory pool
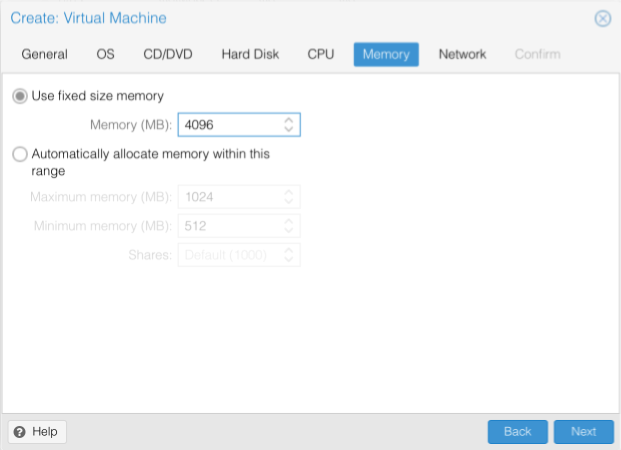
- Used Fixed Size Memory
- Memory (MB) = Memory allocation
- Click Next
Setup the VM network configuration
As per my baseline installation guide, my motherboards 1gig NIC is used to handle Proxmox traffic such as management interface and backups etc, this is exposed a vmbr0. A second 10 gig NIC is used for VM specific traffic and is exposed as vmbr10 and vmbr20 representing VLAN 10 (MGMT) and VLAN 20 (VPN LAN) respectfully.
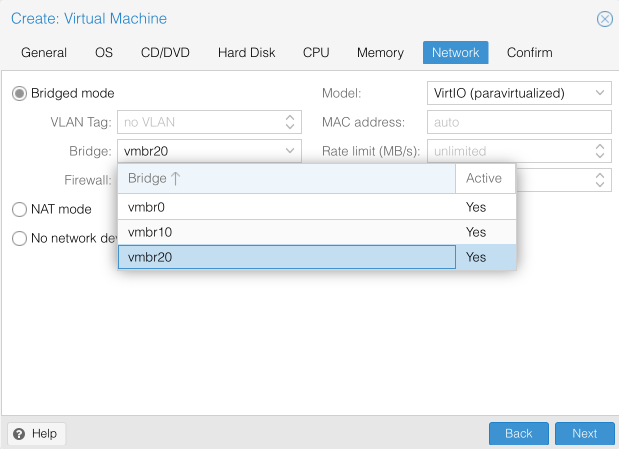
- Bridged Mode
- VLAN Tag = No VLAN
- Bridge = vmbr20
- Firewall = [ ]
- Model = VirtIO (paravirtualized)
- MAC Address = auto
- Rate limit (MB/s) = unlimited
- Multiqueues = blank
- Disconnect = [ ]
- Click Next
Confirm the VM configuration is correct
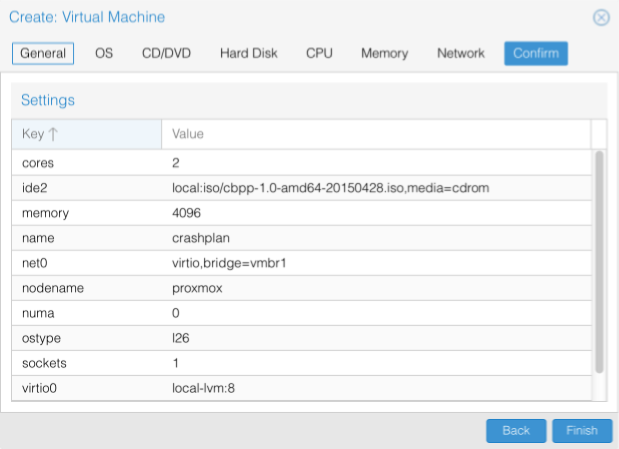
Confirm details and Click Finish to proceed.
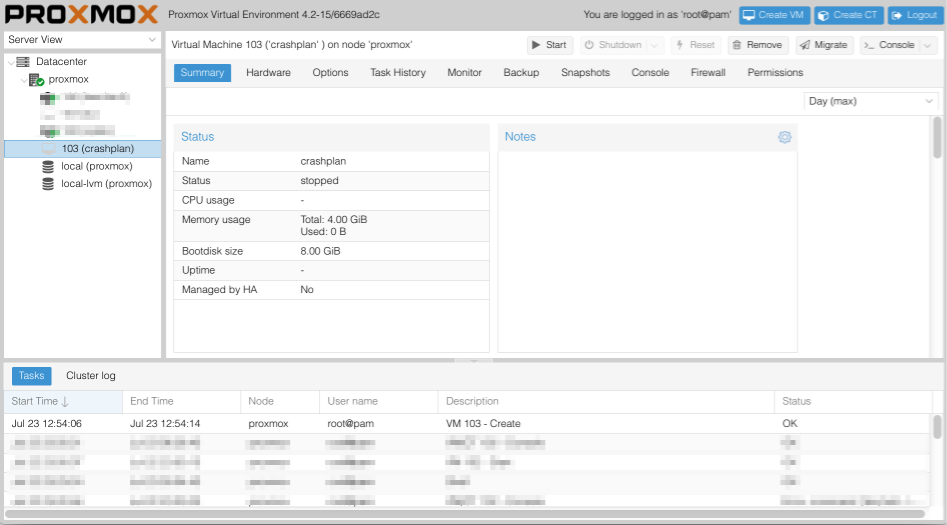
After a few seconds your virtual machine should have been created. Navigate to ServerView > proxmox where you should be able to select your new VM.
Install CrunchBangPlusPlus
In the VM header, click Start to start the VM.
You can then click on Console and you should be presented with another window with the Debian installer boot menu.
Install Debian
CrunchBangPlusPlus is built on top of Debian, we’ll run through the baseline install of Debian now.
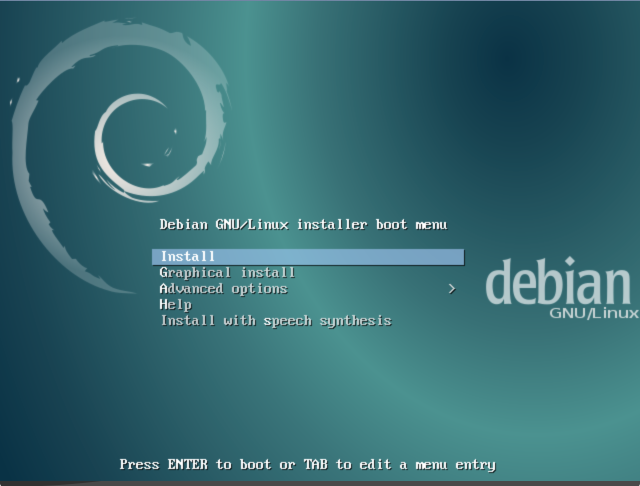
Select Graphical Install
Select a language
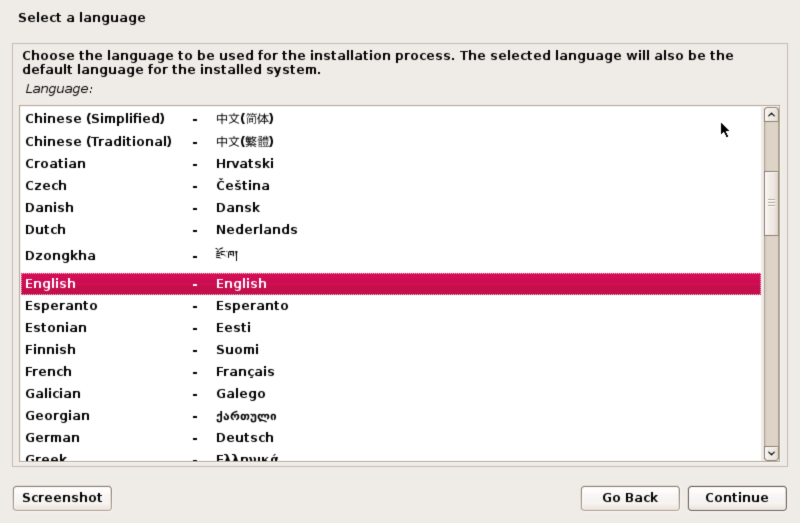
Select your preferred installation language and click Continue
Select your location
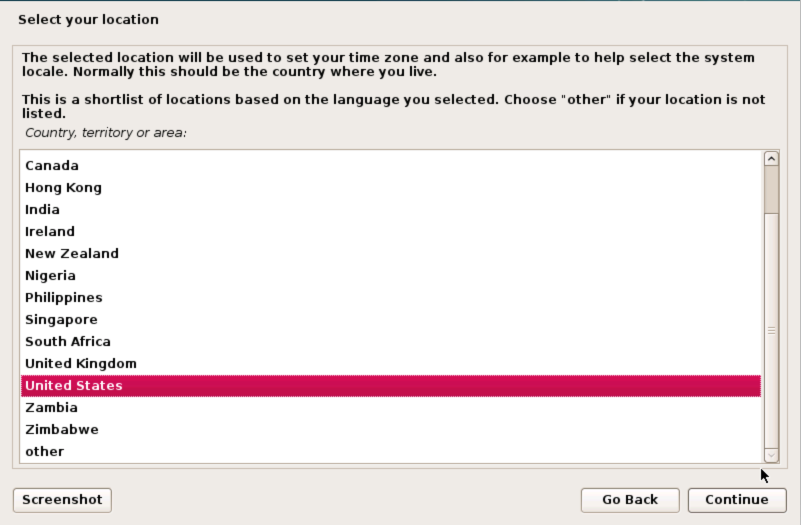
Select your location and click Continue
Select keymap
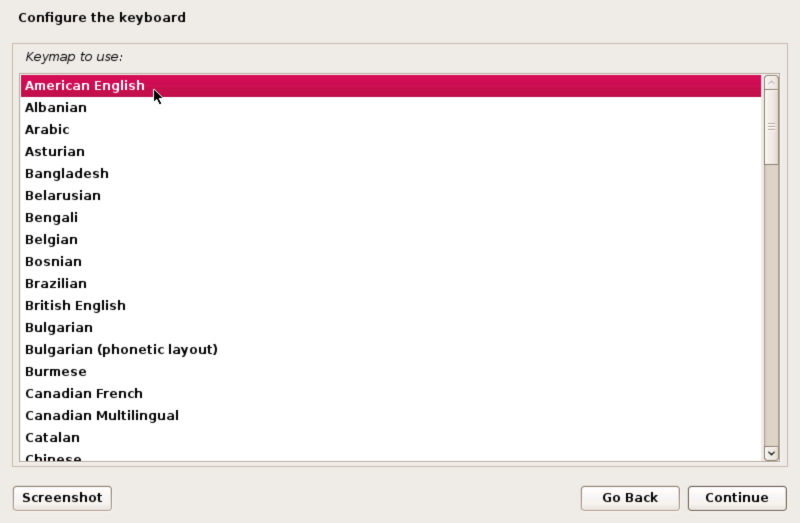
Select your keymap and click Continue
Some files will now be copied to your boot disk and hardware will be detected and configured…
Set hostname
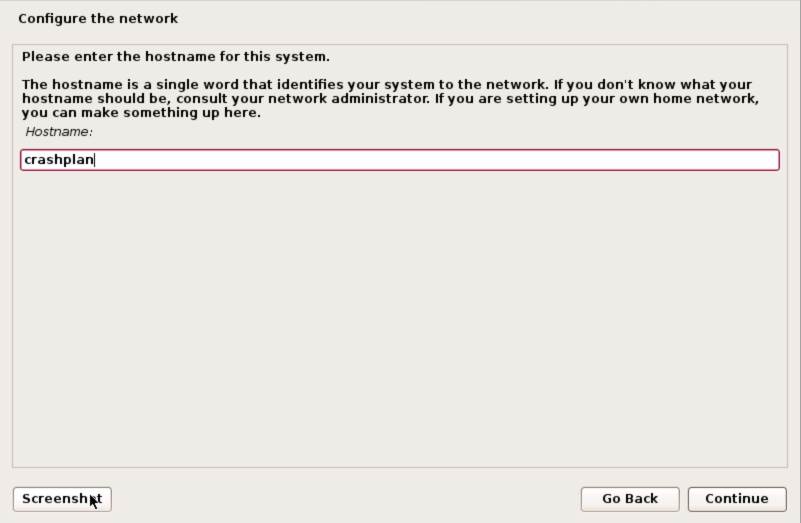
Enter a hostname, in this example I used ‘crashplan’. Click Continue to proceed.
Setup user
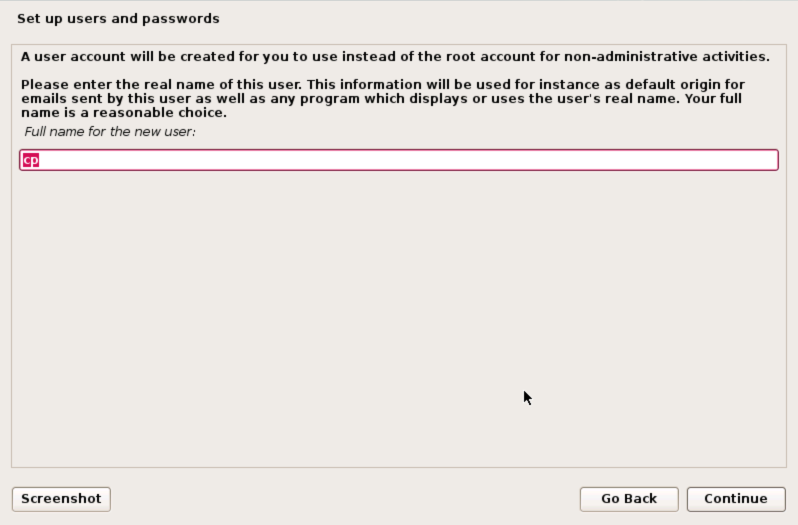
Enter full name of the user, in my case I use ‘cp’ as the system user and click Continue
Set username
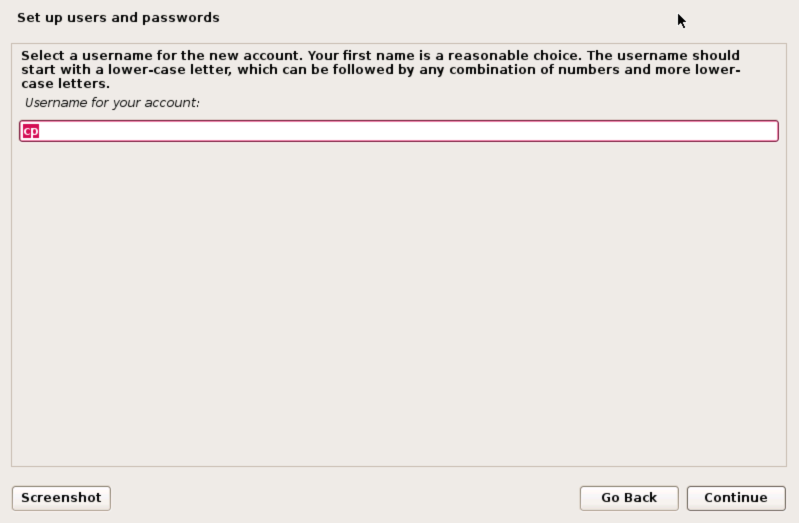
Select username for the user we just created, again I’ll use ‘cp’. Click Continue to proceed.
Set password
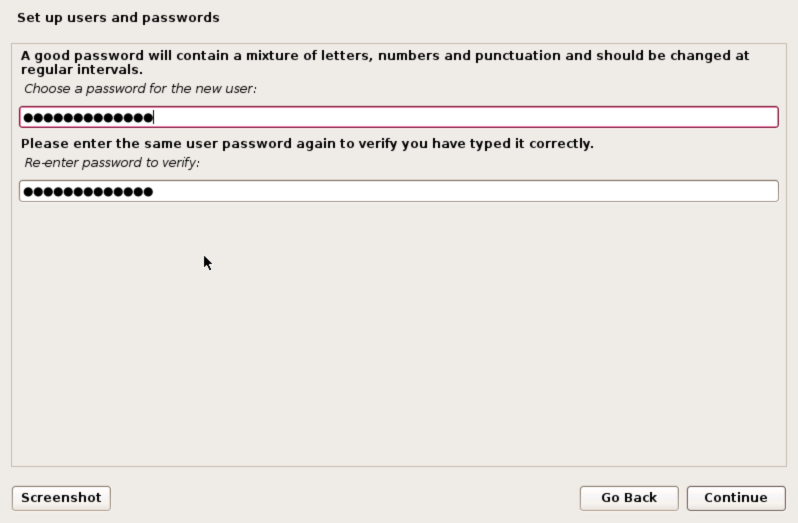
Select a strong password and enter it twice. Click Continue to proceed.
Set timezone
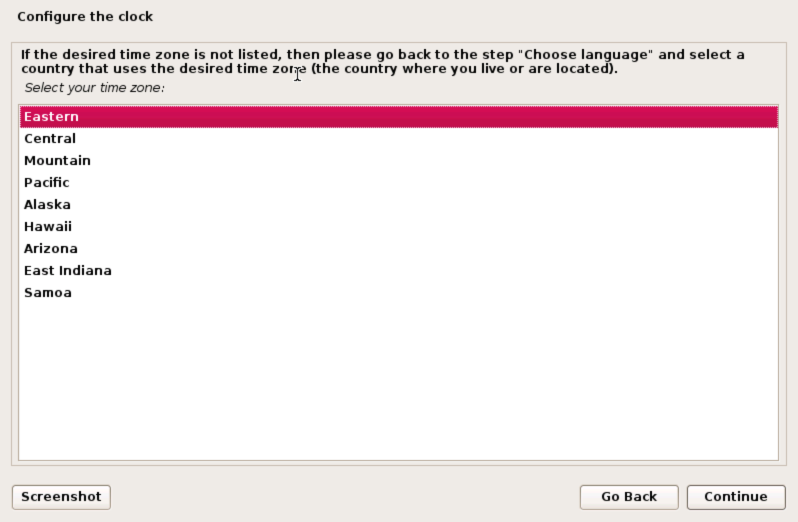
Set desired timezone and click Continue to proceed.
Partition disks
The system disk will now be detected and we can commence with partitioning. Given the intended use of this VM baseline there’s no need for anything fancy. We will use all of the allocated disk space. A simple guided install will take care of creating the primary partition and a small swap space. if you start to notice swap being used it is likely worth increasing the amount of system ram to reduce this.
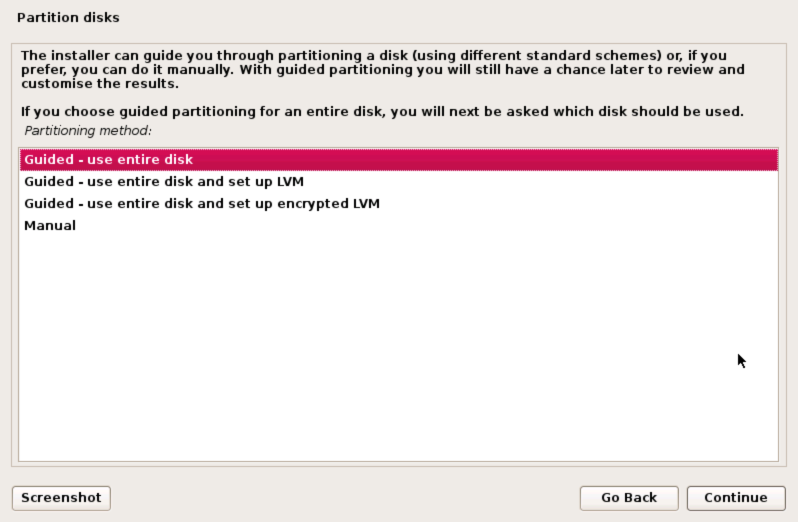
Select Guided - use entire disk and click Continue to proceed
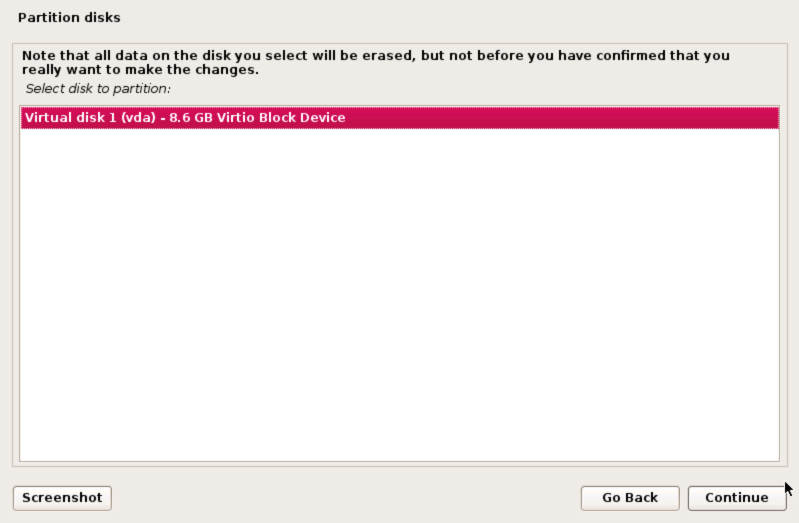
Select disk
Our system only has one disk so go ahead and select ‘vda’ and click Continue to proceed.
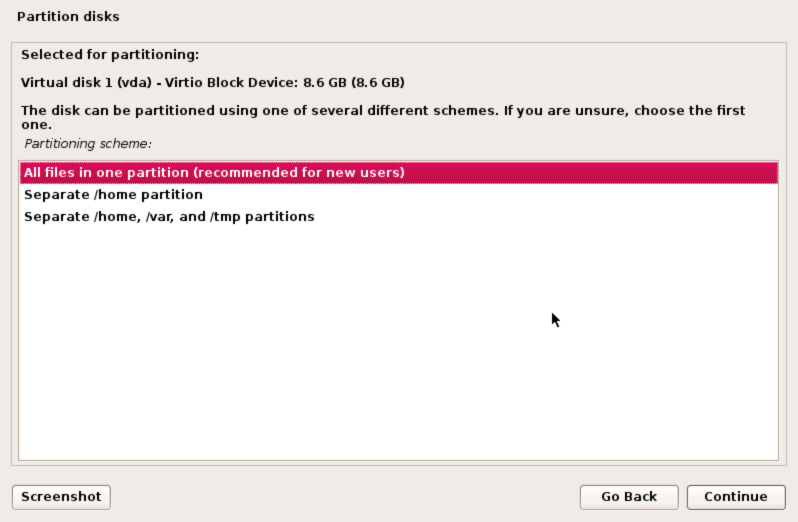
Select partitioning scheme
We’ll go ahead and install all the files into a single partition. There’s no need to complicate this setup given its limited use. Select ‘All files in one partition’ and click Continue to proceed.
Overview confirmation
Check you are happy with the partitioning information and if so, click Continue to proceed. You can see the system has provided a small 401.6MB swap space and the rest of the disk space is assigned to the primary partition.
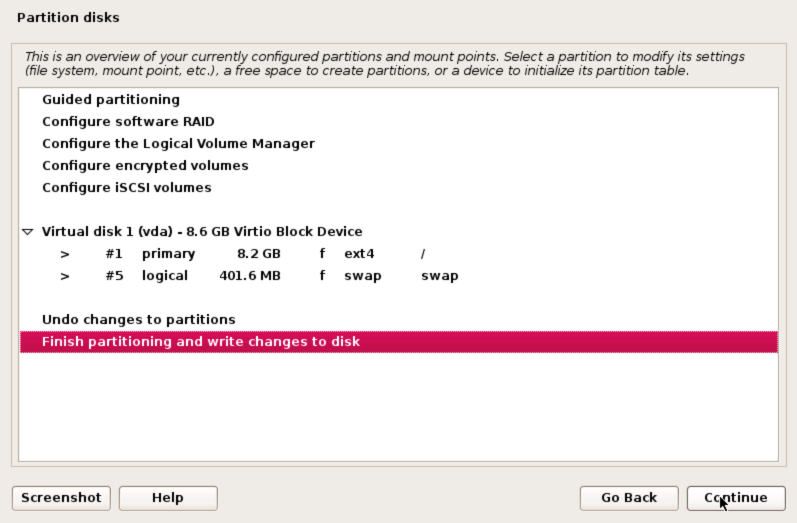
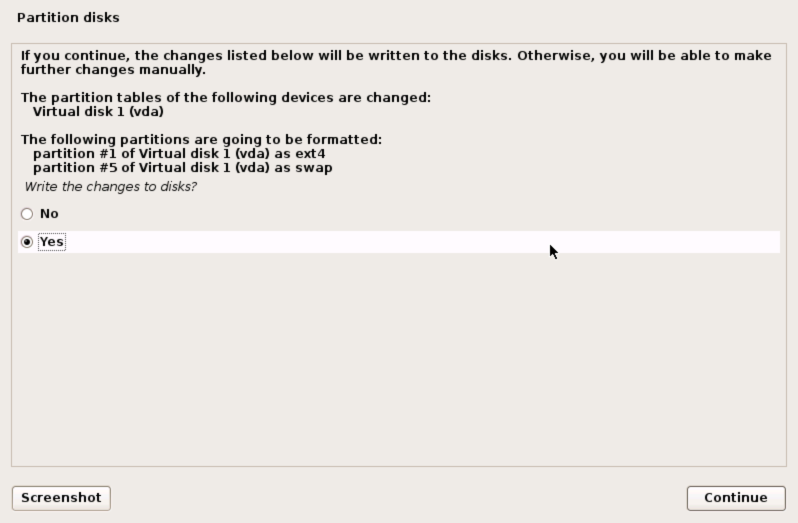
Highlight ‘Finish partitioning and write changes to disk’ and click Continue to proceed.
A final confirmation before the disk contents are destroyed, select ‘Yes’ and click Continue to proceed.
Partitioning will now proceed… After a short wait we can move n to configure the package manager.
Configure the package manager
We’ll need to keep our system updated and install some programs so configure the package manager by highlighting an area and click Continue to proceed.
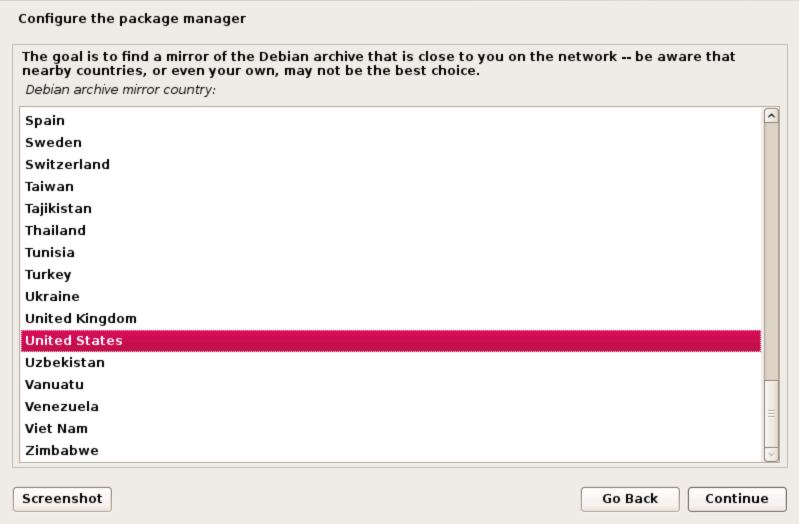
and again, select the Debian archive mirror close to you.
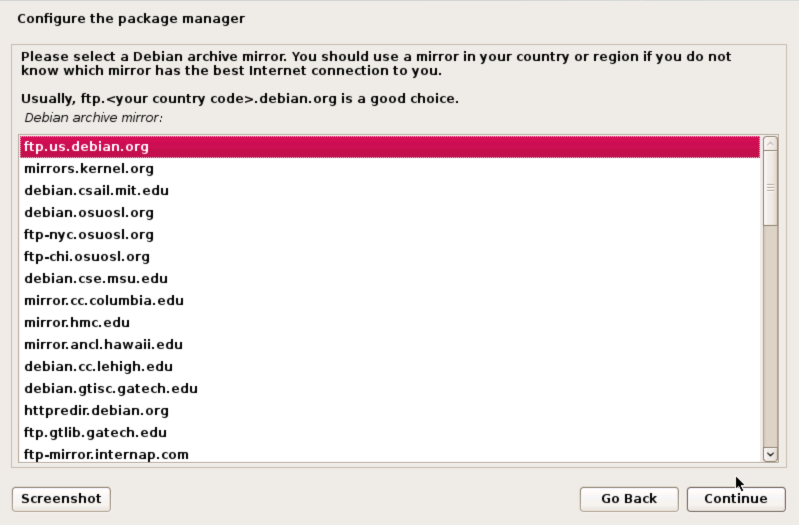
Click Continue to proceed.
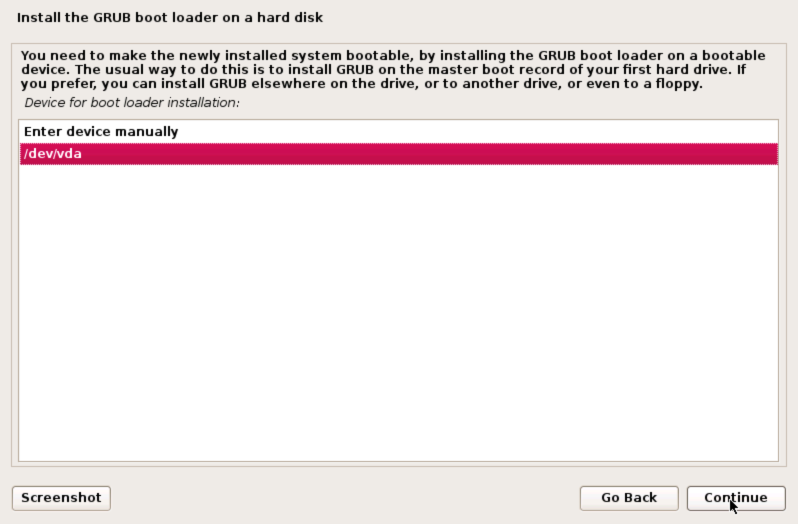
Install grub
In order for our VM to boot, we need to install a grub boot loader on the primary system disk. As this is the only OS, we can go ahead and install it to the Master Boot Record. Select ‘Yes’ and click Continue to proceed.
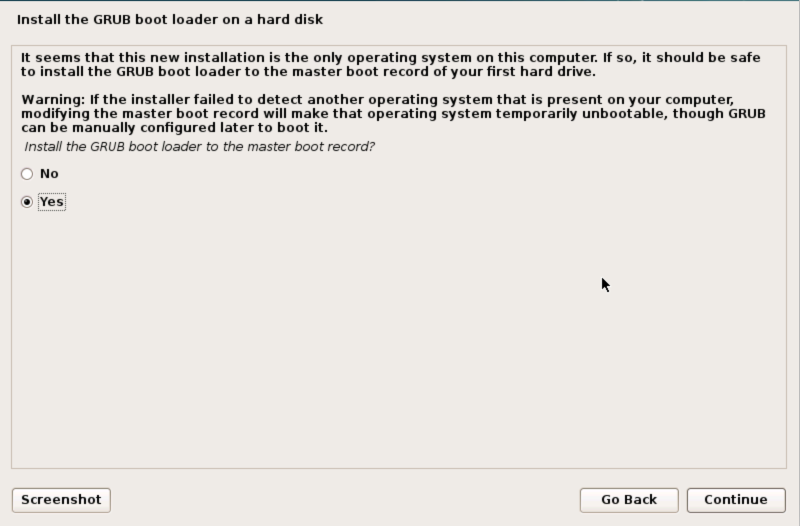
Highlight our only drive, ‘/dev/vda’ and click Continue to proceed to write the grub loader to our drive.
Install complete!
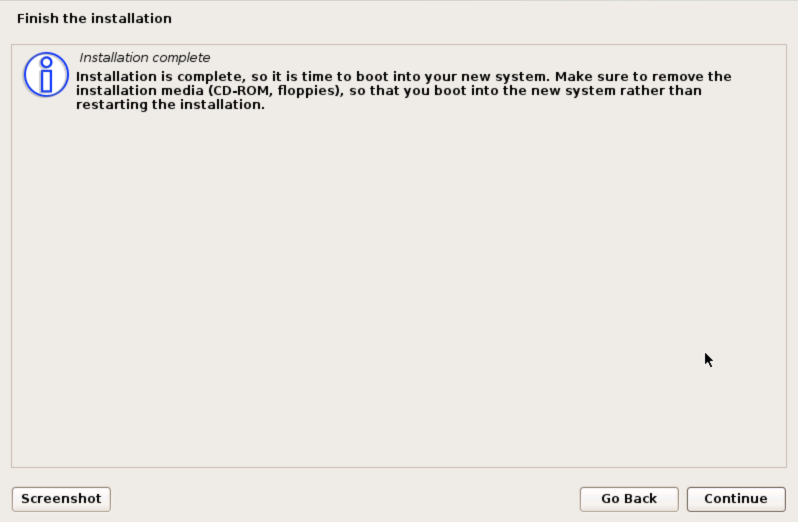
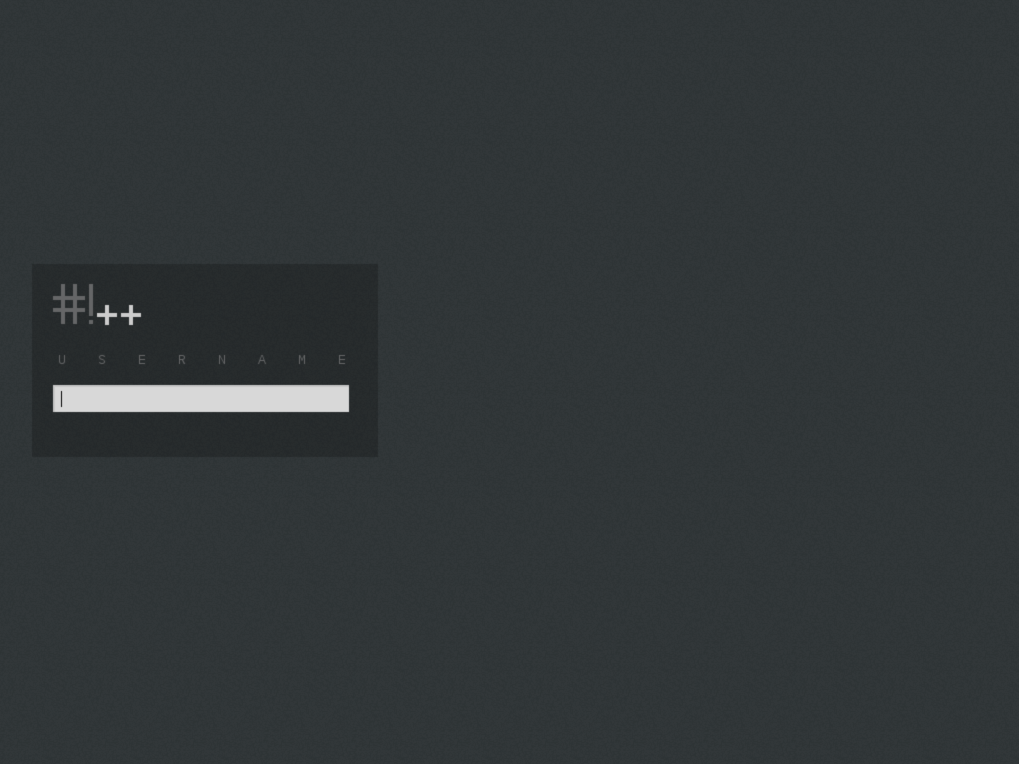
Congratulations, you now have a basic working Linux VM. Click Continue to reboot, CrunchBangPlusPlus should load through a login screen where you can enter your username and password to login to the desktop environment.
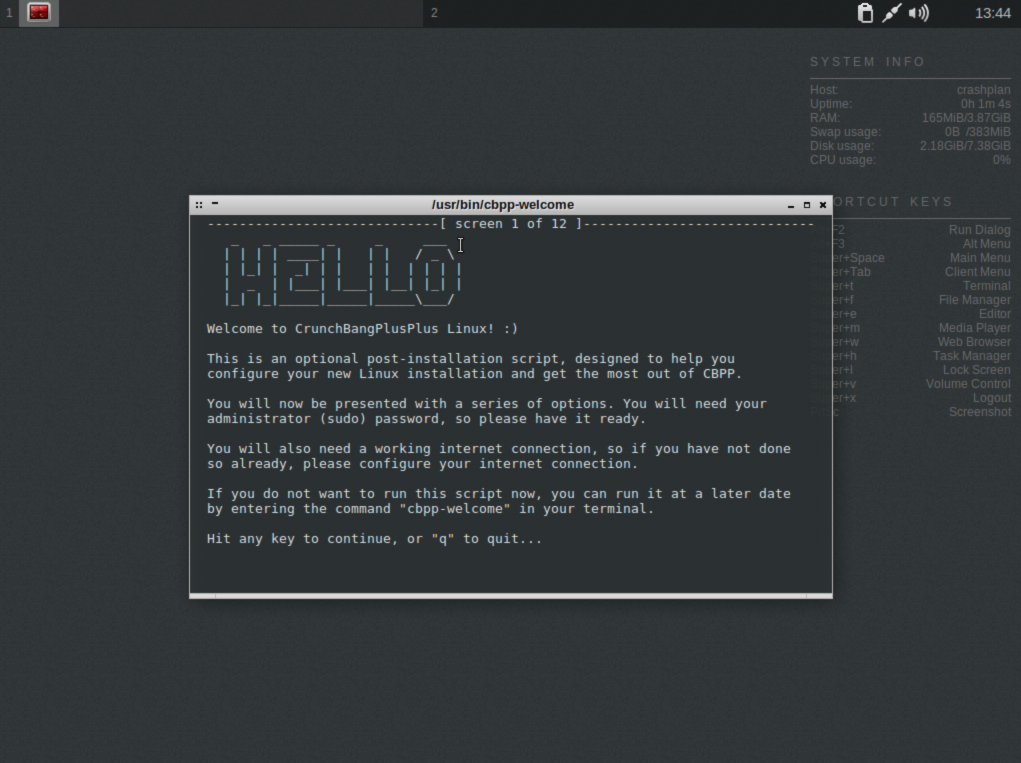
Configure CrunchBangPlusPlus
At this stage we have a functional Linux desktop. You can see in the system info display on the background CrunchBangPlusPlus impressively runs in less than 200MB of RAM and takes 2.2GB of disk space. It is possible ot shrink it further but its so lightweight I didn’t think it was worth the effort.
Close the cpbb-welcome window, or enter q to quit it. The configurator offers some neat additional configuration steps but largely they are superfluous for our baseline requirements. The important steps are however captured in this guide.
Set root password
Right click on the CBPP desktop and open a terminal prompt.
Lets set the root password. Remember to use a strong password for this account.
sudo passwd root
Update Debian install
Lets start off by updating our Debian install.
sudo apt-get update
sudo apt-get dist-upgrade
Enable SSH
I like the ability to be able to SSH into my VMs directly, this can be accomplished by either simple password authentication or SSH keys which are more secure but require a bit more work.
Install SSH
Install SSH with sudo apt-get install ssh and start the service with sudo /etc/init.d/ssh start
Root Password auth
To optionally allow root logins. This is clearly a potential security issue so consider if you really need to do this. Otherwise you can log in via a regular user and promote to root with the su command.
Edit the SSH config with sudo nano /etc/ssh/sshd_config
and edit the PermitRootLogin line to
PermitRootLogin yes
Restart the SSH service
Enter sudo /etc/init.d/ssh restart
Configure NTP
In the terminal window, enter sudo nano /etc/ntp.conf and edit the section which details the NTP servers. Comment out the default servers by adding a hash in front of them and add your local source, in my case this is my pfSense router which is at IP address 192.168.20.1.
# pool.ntp.org maps to about 1000 low-stratum NTP servers.  Your server will
# pick a different set every time it starts up.  Please consider joining the
# pool:
# server 0.debian.pool.ntp.org iburst
# server 1.debian.pool.ntp.org iburst
# server 2.debian.pool.ntp.org iburst
# server 3.debian.pool.ntp.org iburst
server 192.168.20.1 iburst
Restart the NTP service with sudo /etc/init.d/ntp restart and verify it started correctly with sudo /etc/init.d/ntp status.
Verify your server is syncronising correctly by entering ntpq -p, for example
$ ntpq -p

     remote           refid      st t when poll reach   delay   offset  jitter
==============================================================================
*192.168.20.1    198.60.22.240    2 u   10  256  377    0.213    1.114   0.127
a ‘*’ by the remote address means that the system clock is syncronising with the NTP clock.
Configure automated shutdown (UPS)
The Promxmox host needs the ability to shutdown virtual machines correctly and safely. This is accomplished via ACPI commands. Without ACPI being installed and configured Proxmox cant initiate a safe shutdown of the VM, either automatically from a UPS event, or from user interacting with the Proxmox interface. Without ACPI correctly configured you will see errors in the VM task list such as
TASK ERROR: command '/bin/nc6 -l -p 5900 -w 10 -e '/usr/sbin/qm vncproxy 103 2>/dev/null'' failed: exit code 1
Install prerequisite software
Enter the command sudo apt-get install acpi-support to install ACPI support.
Edit shutdown script
We will edit the power button event to initiate the shutdown command. Enter sudo nano /etc/acpi/events/powerbtn-acpi-support and edit the file so it contains.
event=button[ /]power
action=/sbin/shutdown -h -P now
then start the service by entering sudo /etc/init.d/acpid start, for example
$ sudo /etc/init.d/acpid start
[ ok ] Starting acpid (via systemctl): acpid.service.
you can check it started correctly by entering sudo /etc/init.d/acpid status, for example
$ sudo /etc/init.d/acpid status

● acpid.service - ACPI event daemon
   Loaded: loaded (/lib/systemd/system/acpid.service; disabled)
   Active: active (running) since Sat 2016-07-23 18:01:55 EDT; 50s ago
 Main PID: 443 (acpid)
   CGroup: /system.slice/acpid.service
           └─443 /usr/sbin/acpid

Jul 23 18:01:55 crashplan acpid[443]: starting up with netlink and the input layer
Jul 23 18:01:55 crashplan acpid[443]: 27 rules loaded
Jul 23 18:01:55 crashplan acpid[443]: waiting for events: event logging is off
Verify shutdown script
You should try to initiate a VM client shutdown from the Proxmox user interface and verify everything works correctly. Hopefully the VM will shutdown promptly and cleanly reporting ‘OK’ in the event log rather than the previous ‘Error, VM quit/powerdown fail’.
If you have any issues, you may need to restart the service by entering sudo /etc/init.d/acpid start
N.B: Due to the importance of proper shutdown procedures in time of power outage, I recommend verifying the full UPS shutdown stack to be sure this is working as expected.
Configure automated share mounting (CIFS)
I originally mounted my shares via fstab however this caused me some issues. In my experience, it appears fstab runs before the network is completely up and ready to accept connection attempts and therefore some folders may not mount correctly. I had some issues with this when setting up my Crashplan VM and found the autofs solution to be a much more reliable solution.
I’ll focus on one specific folder called ‘Data’ here but it should be simple to extrapolate as required.
Install prerequisites
Install autofs, CIFS and smbclient packages with the following command.
sudo apt-get install autofs smbclient cifs-utils
Verify SMB by running by smbclient -L <hostname> where hostname is the name of your server hosting the shares, for example.
$ smbclient -L freenas
Domain=[WORKGROUP] OS=[Windows 6.1] Server=[Samba 4.3.6-GIT-UNKNOWN]

  Sharename       Type      Comment
  ---------       ----      -------
  Data            Disk
  IPC$            IPC       IPC Service (FreeNAS Server)
Domain=[WORKGROUP] OS=[Windows 6.1] Server=[Samba 4.3.6-GIT-UNKNOWN]

  Server               Comment
  ---------            -------
  FREENAS              FreeNAS Server
  NGUVUWIN8            Win8

  Workgroup            Master
  ---------            -------
  WORKGROUP            FREENAS
Configure autofs
Edit autofs master configuration file by entering sudo nano /etc/auto.master
Add the following to the bottom of the file, /mnt /etc/auto.smb-shares
so the file looks like this
# Sample auto.master file
# This is an automounter map and it has the following format
# key [ -mount-options-separated-by-comma ] location
# For details of the format look at autofs(5).
#
#/misc  /etc/auto.misc
#
# NOTE: mounts done from a hosts map will be mounted with the
# "nosuid" and "nodev" options unless the "suid" and "dev"
# options are explicitly given.
#
#/net -hosts
#
# Include /etc/auto.master.d/*.autofs
#
+dir:/etc/auto.master.d
#
# Include central master map if it can be found using
# nsswitch sources.
#
# Note that if there are entries for /net or /misc (as
# above) in the included master map any keys that are the
# same will not be seen as the first read key seen takes
# precedence.
#
+auto.master

/mnt /etc/auto.smb-shares
Credentials file
To avoid storing the username and passwords of the shared folders in the configuration file, we’ll create a credential file in the user folder by entering sudo nano /home/<user>/.smbcredentials. Replace <user> with the name of your current user.
This file should be populated only with the username and password used for accessing the shared folder, no spaces either side of the ‘=’ sign. For example
username=nguvu
password=mystrongpassword
Reduce the access rights to this file by entering sudo chmod 600 /home/<user>/.smbcredentials. Again, replace <user> with the name of your current user.
You will need a credential file for each share you access which doesn’t share the same username and password.
Configure shares
We’ll now create the configuration file that specifies the folders we want autofs to mount for us by entering sudo nano /etc/auto.smb-shares
Enter the following line into this file
Data -fstype=cifs,ro,credentials=/home/<user>/.smbcredentials ://freenas/Data
Data is the name of the folder the line refers to.
fstype is the share filesystem type, in our case, CIFS
ro mounts the share as read-only, rw would mount as read/write
credentials specifies the file containing the username and password to use for authorisation. Note you can’t use ‘~’ here to represent the users home folder.
://freenas/Data is the network location of the share
It should be simple enough to extrapolate form that line into the other shares you would like to access.
Start and verify autofs
Start autofs by entering sudo /etc/init.d/autofs start and verify its status with sudo /etc/init.d/autofs status
$ sudo /etc/init.d/autofs start
[ ok ] Starting autofs (via systemctl): autofs.service.

$ sudo /etc/init.d/autofs status
● autofs.service - LSB: Automounts filesystems on demand
   Loaded: loaded (/etc/init.d/autofs)
   Active: active (running) since Sun 2016-07-24 00:04:54 EDT; 31min ago
   CGroup: /system.slice/autofs.service
           └─1998 /usr/sbin/automount --pid-file /var/run/autofs.pid

Jul 24 00:04:54 crashplan autofs[1993]: Starting automount....
Now ensure we can access the directory we setup,
$ cd /mnt/Data
$ ls -l
total 0
drwxrwxrwx 283 root root 0 Nov 15  2015 apps
drwxrwxrwx   2 root root 0 Jul 17 19:43 FreeNAS
drwxrwxrwx   7 root root 0 Oct 18  2014 Linux
drwxrwxrwx 122 root root 0 Jul 17 19:41 Macintosh Apps
drwxrwxrwx   4 root root 0 Jul 17 19:45 pfSense
drwxrwxrwx   3 2001 root 0 Jul 17 19:33 Proxmox
The /mnt/Data folder will unmount itself after a period of activity but will remount whenever it is required by a user or an application.
Debugging
If you need to have further visibility into what’s going on with autofs, you can turn verbose logging on by editing the /etc/default/autofs file and setting the LOGGING line to VERBOSE OR DEBUG.